Essential Guide to Fieldstone Wall Construction Techniques
Fieldstone wall construction is a highly sought-after technique for creating beautiful, durable stone walls that add value and character to any property. With the right materials and techniques, these timeless structures can last for generations. In this blog post, we will delve into the intricacies of fieldstone wall construction and share expert tips on how to achieve an exceptional result.
We’ll begin by discussing the importance of selecting the right stones for your project, focusing on sourcing local stones for authenticity and matching stone sizes with wall dimensions. Next, we’ll cover essential steps in preparing your wall base such as excavating soil to proper depth and laying down base stones evenly.
Furthermore, you’ll learn about advanced building techniques that ensure a sturdy structure including weaving corners for added strength and creating batter to prevent leaning walls. Additionally, we will explore incorporating capstones and granite steps in harmony with your fieldstone design.
Last but not least, our guide will provide insights into efficient stone management on-site by positioning pallets strategically during construction as well as finishing touches like crushed stone application and landscaping elements such as soil integration or bark mulch application.
Selecting the Right Stones
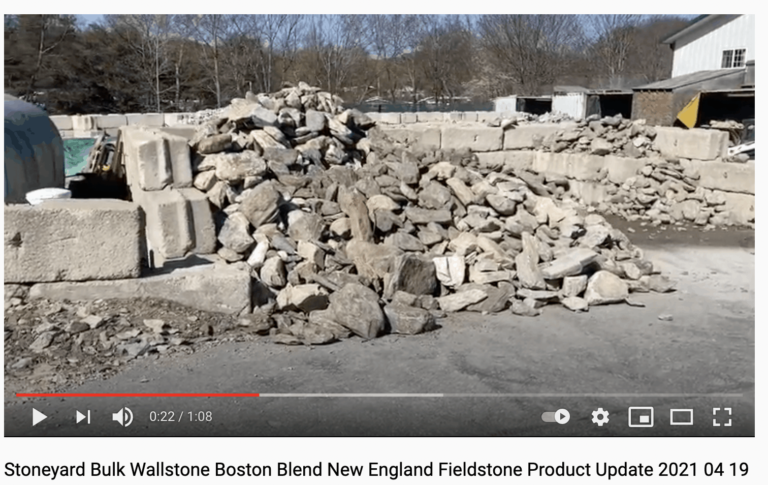
Choosing the right stones for your New England fieldstone wall is crucial for a sturdy and cohesive structure.
Match stone size to wall scale, using larger capstones and building stones as needed.
Local stone adds authenticity and blends seamlessly with native landscapes.
Sourcing Local Stones for Authenticity
Using local fieldstones supports regional businesses and reduces transportation costs.
Locally sourced materials add an authentic touch and blend seamlessly with their surroundings.
Matching Stone Sizes with Wall Dimensions
- Small Walls: Opt for smaller-sized rocks for smaller garden or retaining walls.
- Moderate-Sized Walls: Medium-sized rocks work well for property borders or decorative landscape features.
- Larger Walls: Use bigger boulders for large-scale walls or barriers for increased stability and a bold visual statement.
Choose stones with flat surfaces on at least one side for easy stacking without gaps, resulting in a stable finished product with a beautiful appearance.
Preparing Your Wall Base
Before constructing your New England fieldstone wall, make sure to prepare a solid base that can support its weight by digging away soil, setting down base stones, working up with building stones, and capping off with crushed stone before adding soil or mulch on top.
Excavating Soil for Proper Depth
Ensure the stability of your fieldstone wall by digging a trench deep enough to accommodate the size of your base stones plus an additional 6 inches for a layer of compacted gravel – check out This Old House for detailed instructions on excavating and preparing the site for construction.
Laying Down Base Stones Evenly
Place large flat stones along the bottom of the trench to create a stable foundation, making sure they’re level and evenly spaced to distribute weight across their surface area without causing any gaps or instability issues later on during construction – consider using Stoneyard’s natural New England Fieldstone for a balance between aesthetics and functionality.
- TIP: Slightly tilt base stones toward the centerline of your wall to prevent water from pooling behind them and direct runoff away from both sides.
Ensure each layer above the initial one remains level to maintain overall stability throughout the entire structure once completed.
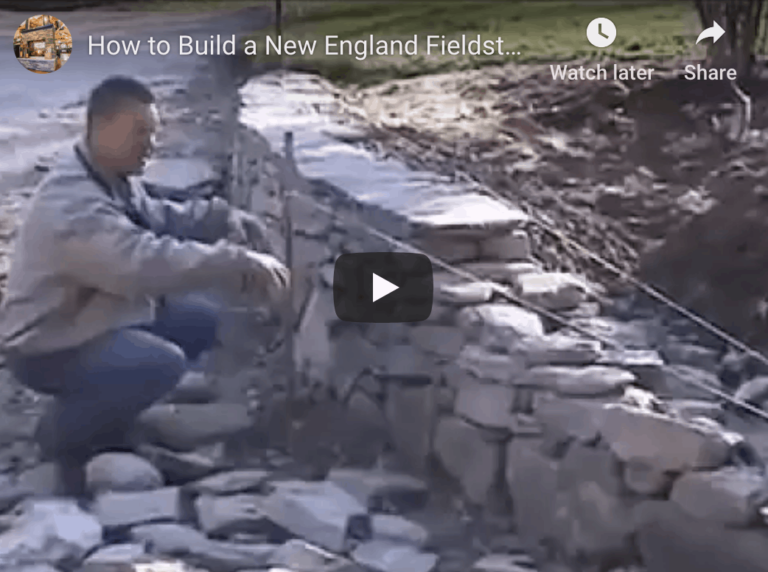
Building Techniques For A Sturdy Wall
Constructing a New England fieldstone wall requires specific techniques to ensure stability over time.
Weaving Corners for Added Strength
Weaving the stones at the corners of your wall is essential to create a strong structure that can withstand external pressures.
Alternating long and short stones interlock with each other, providing additional support to the entire wall.
Follow This Old House’s step-by-step instructions to weave corners effectively.
Creating Batter to Prevent Leaning Walls
A well-built fieldstone wall should have a slight inward slope or batter, which prevents it from leaning outward due to gravity and soil pressure.
Carefully lay out your stones so that they gradually incline towards the center of the wall as you build upwards.
The Dry Stone Conservancy provides valuable resources on creating proper batter for lasting stability.
Filling Voids Between Large Rocks
- Select smaller stones: Choose small rocks or “hearting” material that fits snugly into gaps between larger ones without compromising structural integrity.
- Maintain visual appeal: Be mindful not to detract from the overall aesthetics by using mismatched materials or colors.
- Use mortar if necessary: In some cases, using mortar mix can help secure smaller stones in place and ensure a tight fit.
By incorporating these techniques into your New England fieldstone wall construction, you’ll achieve a sturdy structure that not only looks beautiful but also stands the test of time.
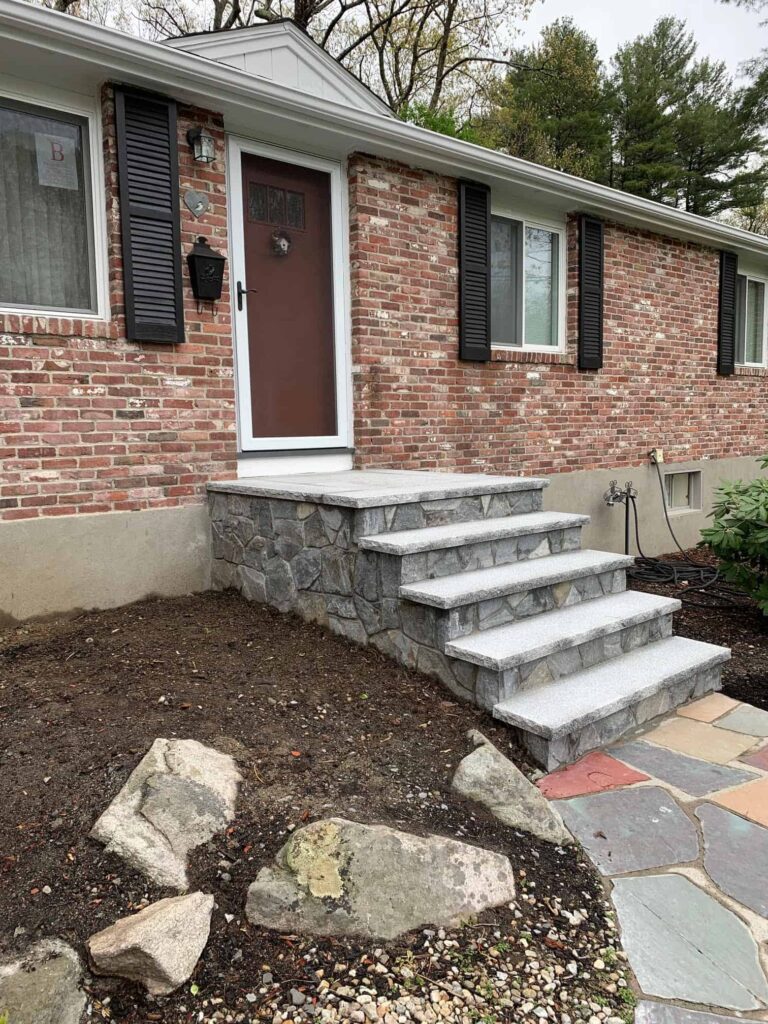
Incorporating Capstones and Steps
Adding capstones to your fieldstone wall not only looks great, but also provides extra support, while granite steps can enhance the overall aesthetic and provide access points.
Using Thick Capstones for a Professional Look
Thick, flat stones make for great capstones, providing stability and a polished appearance that protects the underlying layers from weather damage and erosion. Choose capstones that match the color and texture of your wall for consistency.
Designing Granite Steps in Harmony with Your Wall
Granite steps are both functional and beautiful, but it’s important to choose slabs that complement your fieldstone wall. Determine step dimensions, select complementary materials, and create seamless transitions for a cohesive design.
- Measure step dimensions based on available space and desired incline angle.
- Choose complementary materials that match or contrast nicely with your wall.
- Create seamless transitions between stair edges and adjacent structures to avoid tripping hazards and promote visual harmony.
By thoughtfully incorporating capstones and granite steps into your fieldstone wall project, you’ll achieve a stunning outdoor space that’s both functional and visually appealing. Check out Stoneyard and This Old House for more information.
Efficient Stone Management On-Site
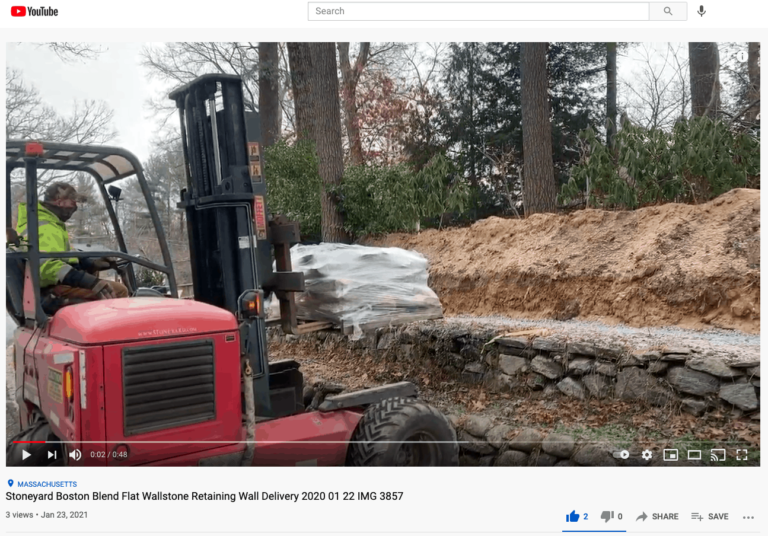
Proper placement of pallets close to the construction site allows easy access when offloading materials during construction without unnecessary delays.
Strategically position pallets near the construction site with level ground and good drainage to prevent potential issues related to water damage or unstable surfaces.
Positioning Pallets for Convenient Access
Position pallets near the construction site while still allowing enough space for workers and equipment to move freely.
Consider placing them in an area with level ground and good drainage to prevent potential issues related to water damage or unstable surfaces.
Natural fieldstone can be unstable if not placed on a level surface.
Offloading Stones Efficiently During Construction
- Create designated areas: Assign specific spots for different types of stones (e.g., capstones, building stones) for easy access.
- Maintain clear pathways: Keep paths between pallets and the work area free from debris or obstacles that could hinder movement.
- Leverage equipment wisely: Utilize machinery such as skid-steers or wheelbarrows whenever possible instead of manually carrying heavy loads over long distances.
- Plan ahead: Anticipate the need for specific stones at different stages of construction and offload them accordingly to minimize downtime.
Implementing these strategies ensures that your New England fieldstone wall project runs smoothly and efficiently from start to finish.
Finishing Touches and Landscaping
Complete your New England fieldstone wall with crushed stone and soil or bark mulch for a polished appearance that blends seamlessly into its surroundings.
Add Crushed Stone for a Refined Look
For added stability and a clean edge, spread a 1-2 inch layer of crushed stone around the perimeter of your completed wall.
Incorporate Soil and Bark Mulch for Aesthetic Appeal
Enhance the overall appeal of your fieldstone wall by adding nutrient-rich soil and bark mulch that promote healthy plant growth nearby.
- Soil: Choose native plants that complement the style and colors of your stonework.
- Bark Mulch: Spread a 2-3 inch layer around the base of your wall, taking care to avoid direct contact with the stones to prevent discoloration over time.
Carefully selecting and incorporating these materials into your landscape design will create a stunning New England fieldstone wall that enhances both its surroundings and overall aesthetic appeal.
FAQs in Relation to Fieldstone Wall Construction
How to Build a Fieldstone Wall
Source local stones for authenticity and match stone sizes with wall dimensions. Excavate soil to the proper depth, lay down base stones evenly, and weave corners for added strength. Create batter to prevent leaning walls, incorporate capstones as finishing touches, and design granite steps in harmony with the fieldstone.
Disadvantages of Stone Walls
High initial cost due to material sourcing and labor-intensive construction process. Regular maintenance such as repointing mortar joints or replacing damaged stones. Provide less insulation compared to other building materials like brick or wood.
Pros and Cons of Stone Walls
Pros include durability, natural beauty, fire resistance, pest resistance, and soundproofing qualities. Cons include higher upfront costs and labor-intensive installation processes.
Best Base for a Stone Wall
The best base for a stone wall is typically compacted gravel or crushed rock combined with sand which provides stability while allowing water drainage from behind the structure. Learn more about preparing your wall base here.
Constructing a Fieldstone Wall: Tips and Techniques
Building a fieldstone wall requires careful planning and execution, including sourcing local stones for authenticity and matching stone sizes with wall dimensions.
Weaving corners for added strength and creating batter to prevent leaning walls are important techniques to keep in mind during construction.
Incorporating capstones and steps that complement the fieldstone is essential for achieving an aesthetically pleasing finish.
Efficient stone management on-site is crucial to ensure smooth construction progress.
Applying crushed stone as a final layer and incorporating soil and bark mulch can add finishing touches to your project.
For more information on fieldstone wall construction, check out these credible sources: This Old House and Better Homes & Gardens.