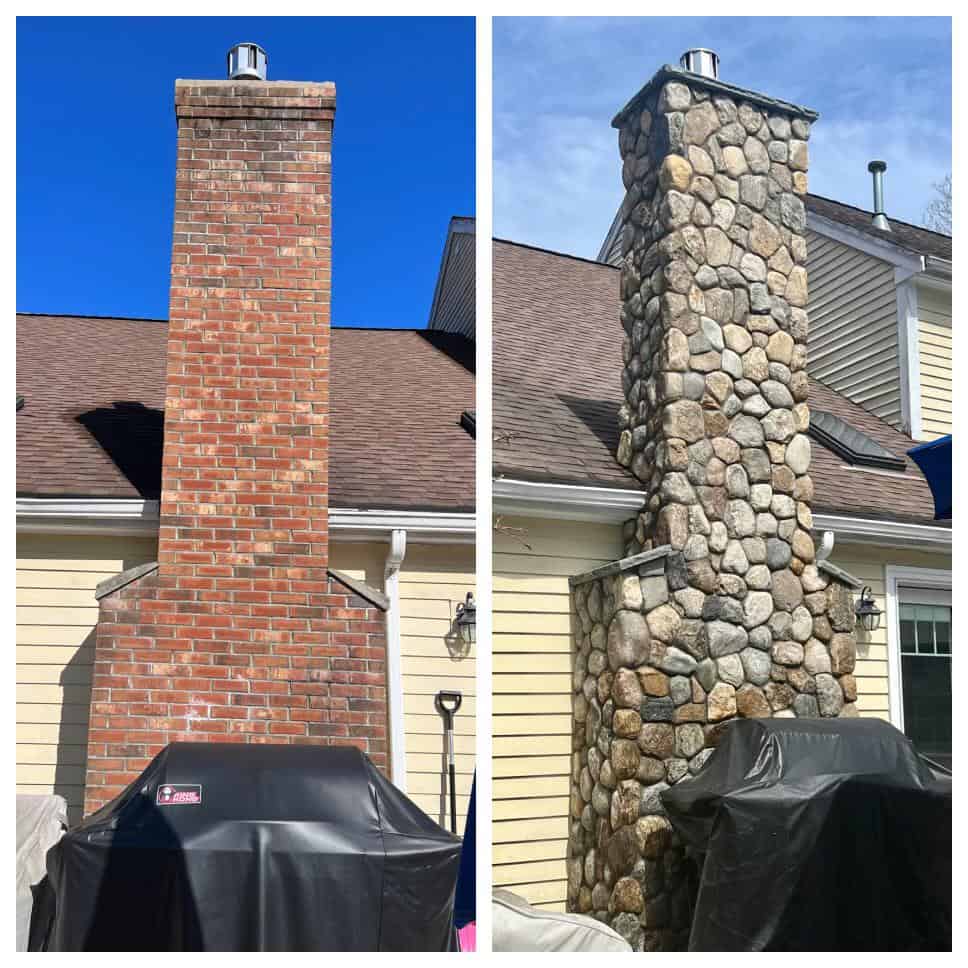
Installing Thin Stone Veneer Over Brick
Can you install stone veneer over brick?
Can you install thin stone veneer over a brick wall? This is one of our most frequently asked questions by our customers. Good news for them: the answer is always “yes”! There’s no need for brick removal either. All you have to do is follow our recommended steps for thin stone veneer installation.
Choosing your Thin Stone Veneer
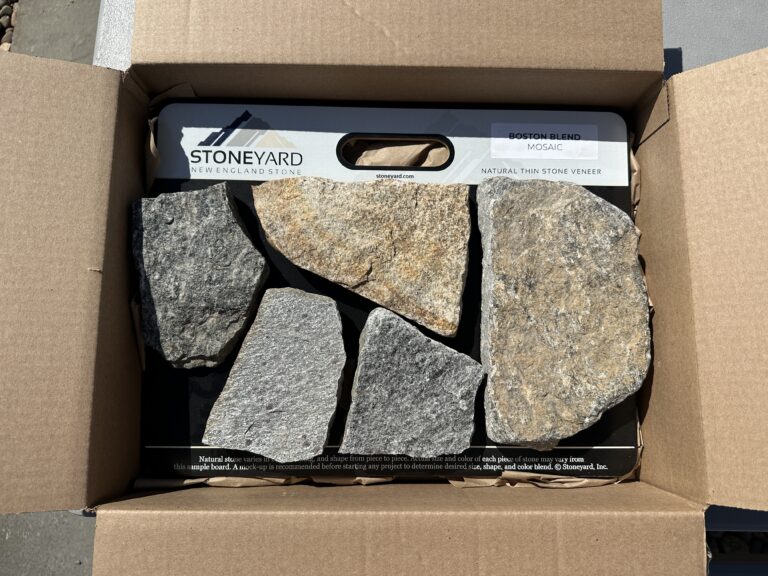
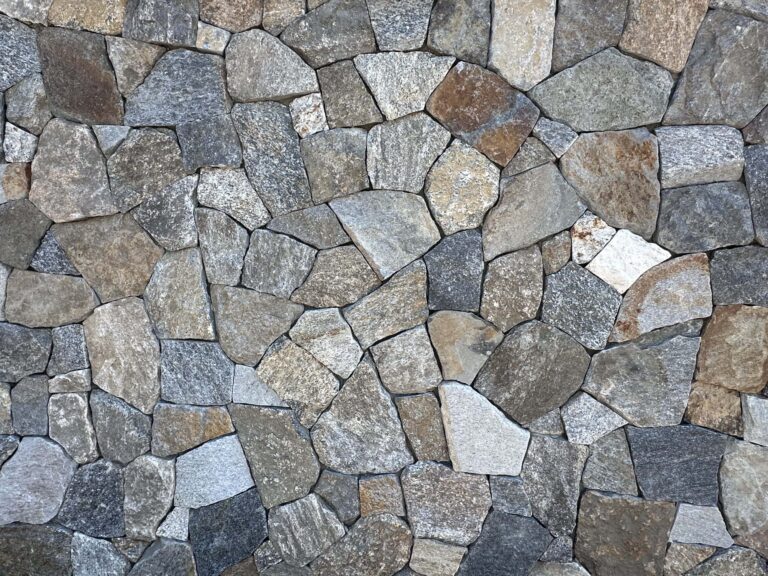
Before you begin installing the stone to your brick surface, you need to select your stone veneer. What visual aesthetic are you hoping to achieve with your stone veneer? Our Thin Stone Veneer collection comes in all different shapes and colors for you to select from. Our Boston Blend Thin Veneer ranges in color from gray to tan and can be found in Mosaic, Round, Ledgestone, Ashlar, and Square and Rectangular shapes.
Is Your Brick Painted?
Once your stone is selected, you are ready to begin the installation process. First, you must ask the question: is the brick painted? If the answer is yes, you must either remove the paint or apply a cement board over the brick. Paint removal will take some time and technique, but it is the preferred method for installing stone over brick. Cement board does not easily attach to brick and will require drilling a hole and applying an anchor to a hard surface.
Repairing the Brick
After removing the paint, a traditional clay brick surface will be left behind. The brick should feel similar to the texture of sandpaper. Prior to installation, you will need to ensure that any loose bricks are repaired and that the surface is clean.
To clean the bricks, use mild detergent and a pressure washer. After cleaning, allow the surface to dry for at least three days before you begin installation.
Prepare an Even Surface
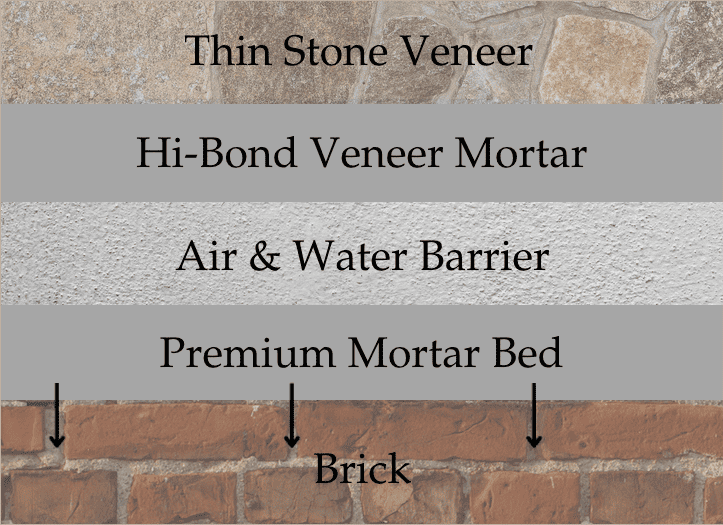
The next step in the installation process is to create an even surface. Ensuring that the surface is flat before you apply the stone is a key component to a successful thin veneer installation. We recommend using the Laticrete Premium Mortar Bed or the Laticrete Hi-Bond Masonry Veneer Mortar to fill in the spaces between each brick before moving to the next step.
Waterproofing the Surface
If you are applying the stone veneer to an exterior brick wall, a balcony, or an interior wall located in a place where it could be susceptible to water infiltration, we recommend waterproofing. Our go-to product for this part of the process is Laticrete’s Air & Water Barrier. This step is essential to ensuring the longevity of the stone veneer project.
Apply two coats of the Air & Water Barrier, with each coat 15-22 MIL in thickness. The thickness can be checked using a Wet Film Gauge.
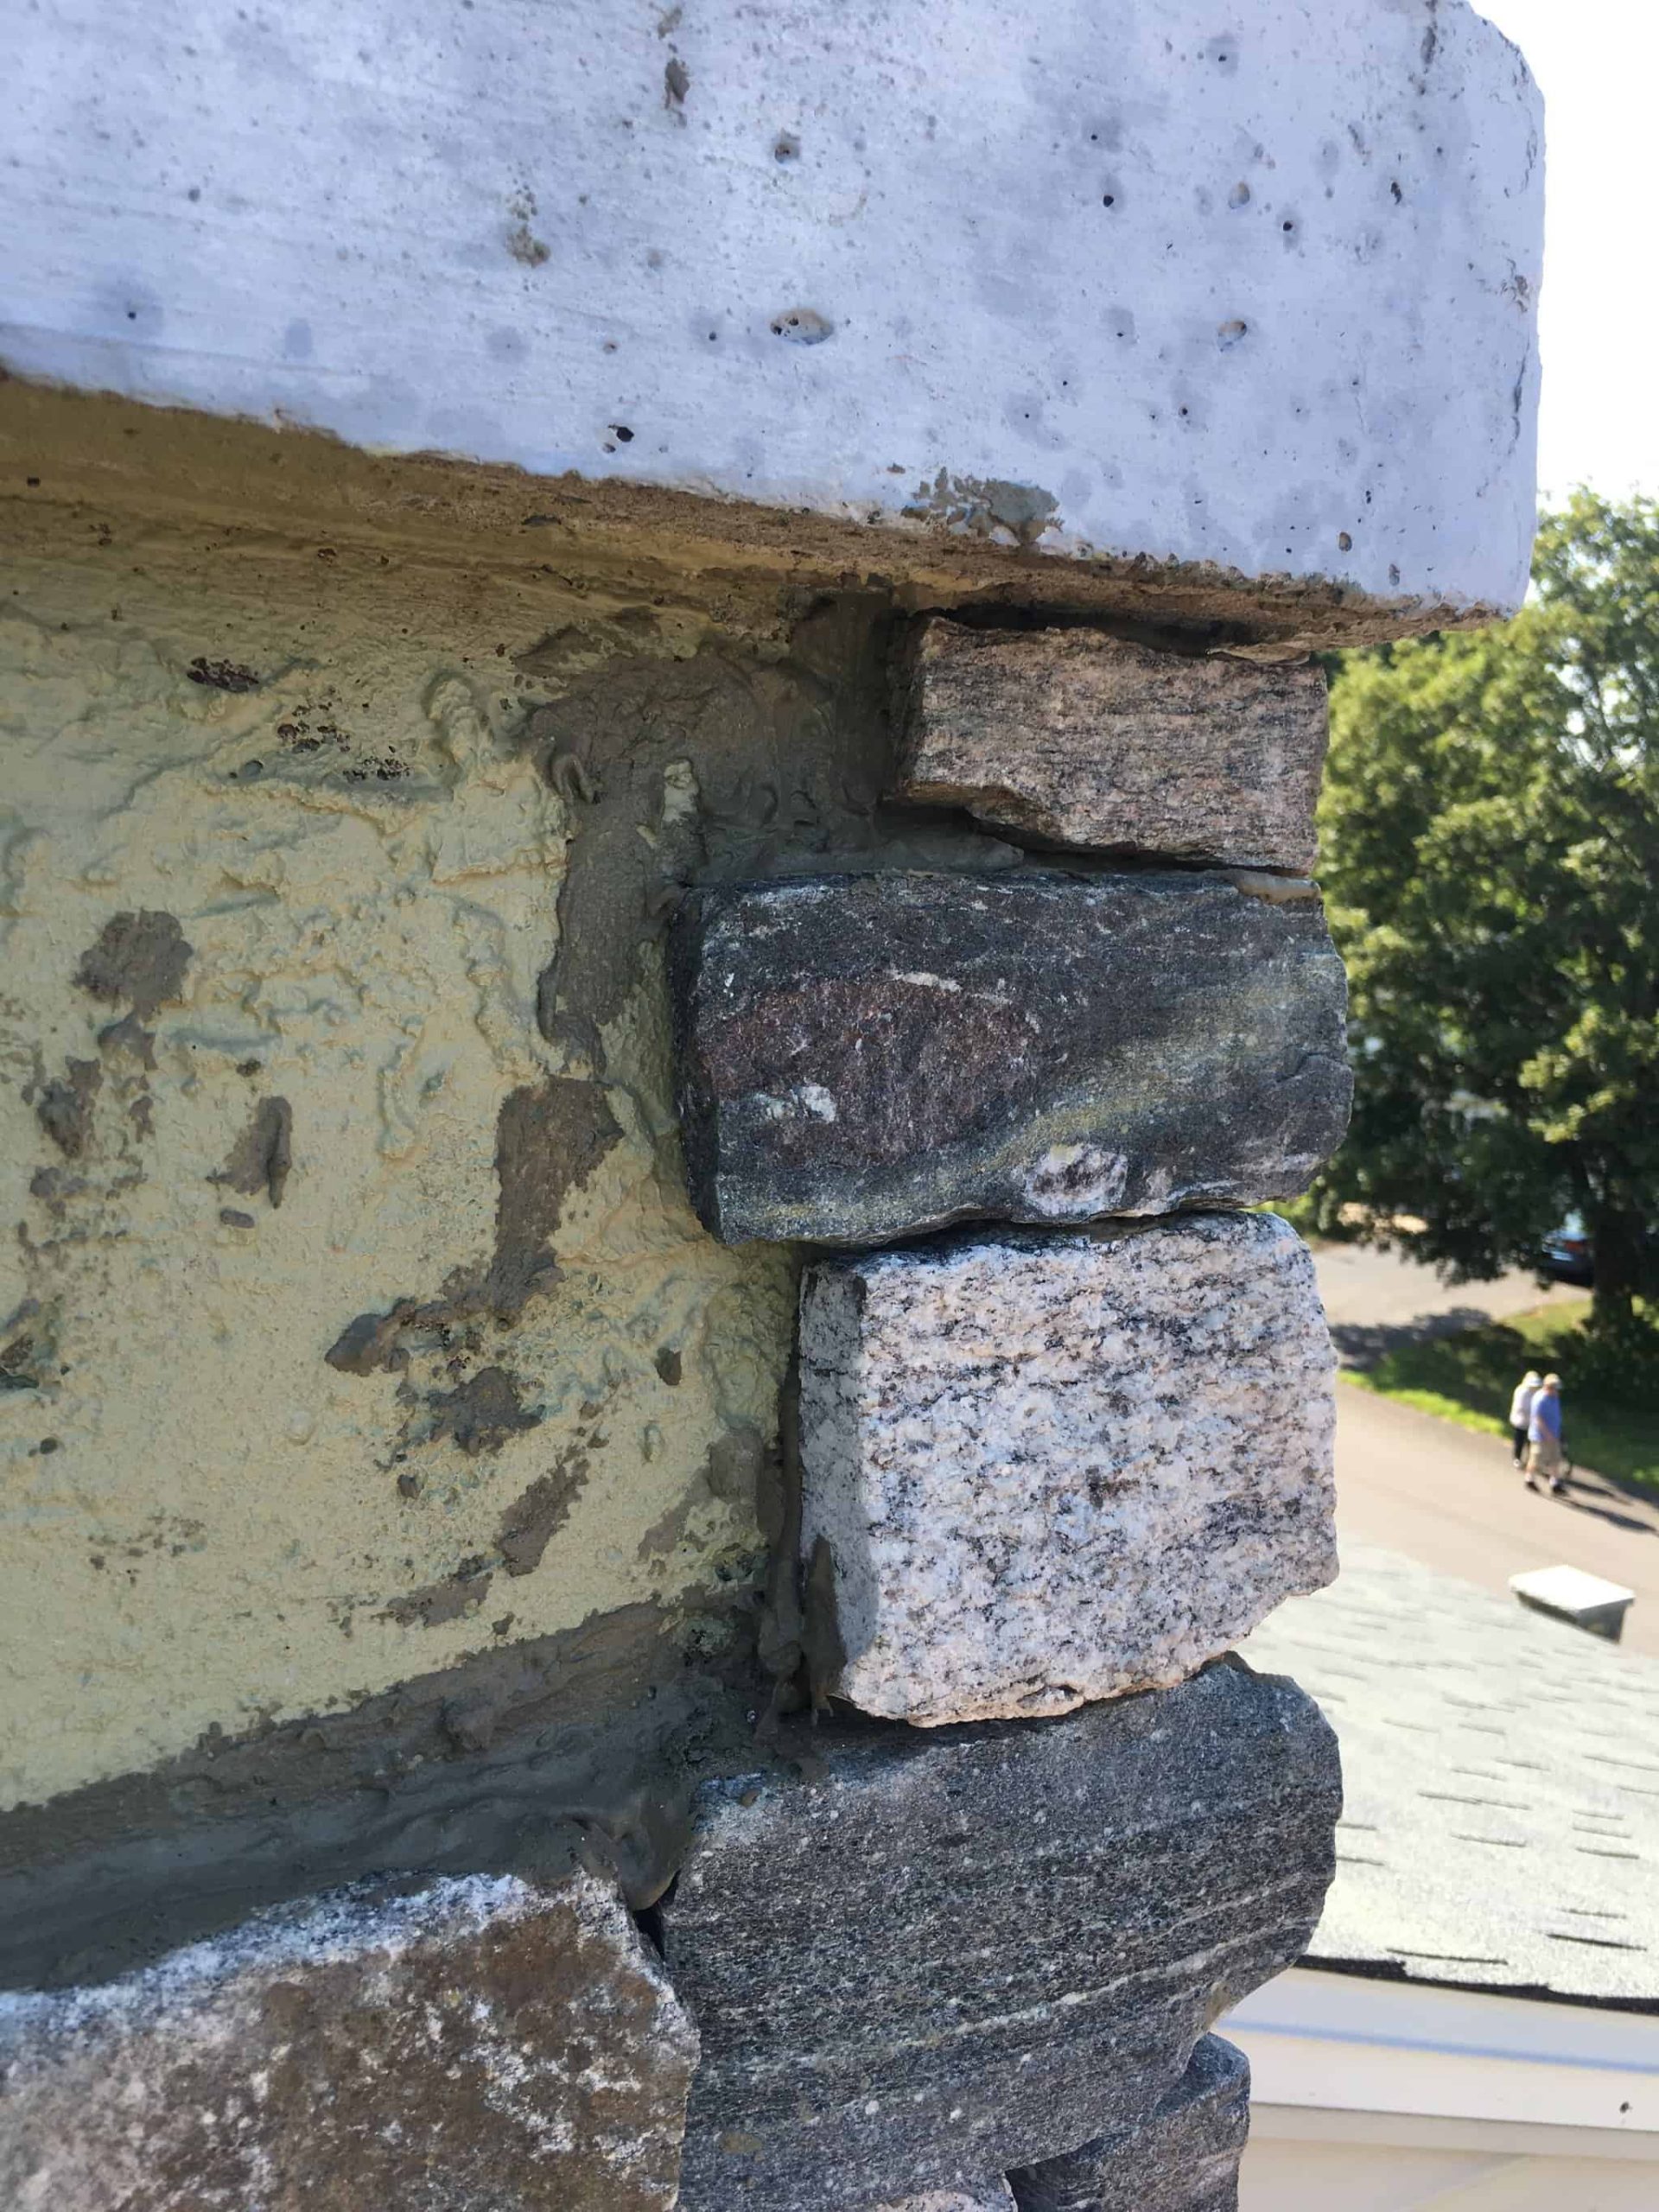
To further help your chimney prevent water penetration, we recommend installing a chimney cap.
Watch our “Preparing the Surface” installation video to learn more about waterproofing.
Trimming your Thin Stone Veneer
Once your surface is prepared and waterproofed, it is now time to install the selected Stoneyard Thin Stone Veneer. Before installing the stone, decide which joint option is preferred. Dry laid (little to no space between stones), standard grout joint (3/8-3/4 inch space), or wide or over grouted joint (1 inch plus space). Depending on the joint option you choose, more or less trimming will be required. Natural stone is irregular by nature and will require cutting and trimming of each piece to fit the desired design aesthetic. Tools such as the Thin Stone Veneer Hammer, Steel Base Splitter, and Bush Hammer will help create a very natural and rustic finished look.
Watch our in-depth tutorial on “Trimming Natural Thin Stone Veneer“.
Adhering Your Thin Stone Veneer
Now that your stone is trimmed and the surface is prepared, its time to adhere the stone. Take your time applying each stone in the pattern of your choosing. We recommend using Laticrete’s Hi-Bond Masonry Veneer Mortar for this step.
For mortar joint installations, keep spacers in between the stones to hold a consistent joint that can later be pointed. Spacers should be kept in place overnight to maintain the desired spacing while the mortar hardens. If you’ve chosen to dry-stack your stone, you can skip right to cleaning.
Watch our “Adhering Thin Stone Veneer” installation video.
Pointing Your Thin Stone Veneer
Once all of the stones have been applied and the proper setting time has passed, you can remove the spacers and start pointing. Using the recommended Laticrete Pointing Mortar, fill in the joints between each stone. Remember to keep the joints consistent in width and to give it a brushed finish once completed. If some mortar gets on the surface of your stone, do not worry. This can be taken care of in the cleaning process.
See our full video on how to point thin stone veneer.
Cleaning your Thin Stone Veneer
Now that your mortar is dried (typically allow seven days), it’s time to clean it. For exterior applications, we recommend using Prosoco Sure Klean Vana Trol acidic cleaner and a long handled acid brush to clean away excess mortar, dirt, and debris. Make sure you rinse at least four times to remove traces of the acid. Keep cleaning until you are satisfied with the final result. A pressure washer can significantly speed up this process.
For interior stone applications, follow the same cleaning instructions, but this time use Prosoco’s Safety Klean cleaner.
View our “How to Clean Thin Stone Veneer” video here.
Finally, ENJOY!
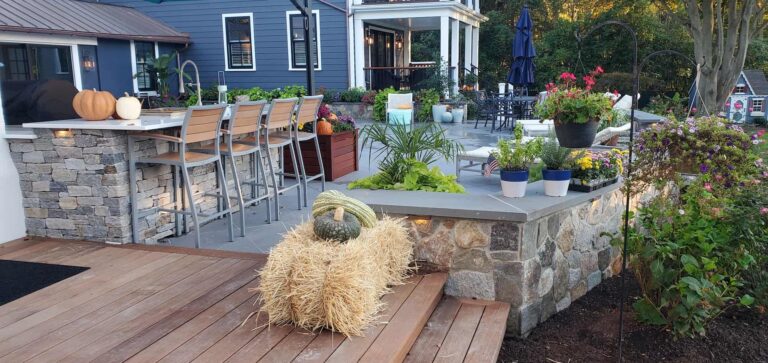
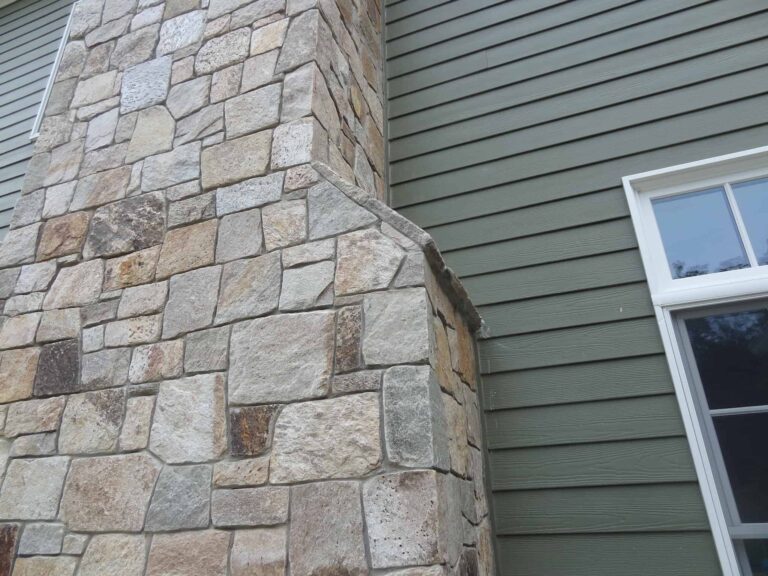
Once clean, you get to enjoy your new natural stone project. The industrial brick is gone, revealing a new natural, rustic aesthetic. Your fireplace, accent wall, backsplash, or home siding will now have the timeless appeal and longevity of natural stone.
See our complete Thin Stone Veneer Installation Guide with Detailed Video Instructions