Complete Stone Veneer Installation Guide
Professional Guide for Residential and Commercial Projects
Created: January 2025 | Revised: November 2025 | Doc ID: STY-IG-CSVG
About This Guide
This guide shows you how to install genuine Stoneyard Natural Thin Stone Veneer the right way clearly, safely, and consistently. It replaces scattered PDFs with one trusted reference for planning, ordering, and installation.
- What this is: a practical, premium field manual that also helps you make design and specification choices.
- What this is not: a substitute for local codes or appliance instructions. Always follow project specifications and local building requirements.
Pro Tip: Scan the QR code on the printed copy (or bookmark the web page) to access calculators, videos, BIM/CAD files, and updates at stoneyard.com/install
Who This Guide Is For
- Contractors & Masons — step-by-step substrate prep, joint styles, weather limits, troubleshooting.
- Builders & General Contractors — scope clarity, sequencing, submittals, quality control.
- Architects — specs (CSI 04 73 00), tolerances, ASTM/MVMA references, BIM/CAD downloads.
- Designers (Interior / Landscape) — shapes, colors, joint looks, mockup workflow.
- Specifiers & Estimators — take-off basics, corners vs flats, waste factors by shape.
- Developers & Owners — durability, maintenance, harsh-climate performance.
- Project Managers & Supers — substrate readiness, weather windows, inspection points.
- Dealers & Showroom Teams — sample strategy, showroom visuals, QR resource hand-offs.
- Building Officials & Inspectors — substrate and barrier review, control joints, fire safety.
- Facility Managers — cleaning, sealing (optional), annual inspection.
- Sales & Customer Support — consistent answers from one verified source.
- Homeowners — overview of what to expect and how to confirm professional installation.
PRO TIP
For any exterior or wet-area installation, include an air and water barrier plus drainage. The wall behind the stone matters as much as the stone itsel f.
How to Use This Guide
- Start with Sections 1–2 to choose color, shape, and joint style; build a mockup.
- Use Section 3 to calculate flats, corners, and waste (then verify with the online calculators).
- Read Section 5 to confirm substrate and waterproofing needs.
- Follow Sections 6–9 for joints, trimming, mortar, finishing, and cleaning.
- Check Sections 10–11 for common issues, specs, and references.
- Use the Appendices for checklists, safety notes, alternates, and spec language.
Avoid: making field changes without review. Small shortcuts often cause big callbacks.
What You’ll Find Inside
- Design & Ordering: shapes, colors, mockups, samples, calculators.
- Installation: cement board and other approved substrates, masonry direct bond; joints, trimming, and mortar application.
- Harsh-Climate Practice: cold/hot weather methods, coastal and below-grade conditions.
- Quality & Safety: tolerances, silica safety, checklists, inspections.
- Professional Assets: specs (CSI), standards (ASTM/MVMA), BIM/CAD resources.
Table of Contents
- What Is Natural Thin Stone Veneer
1.1 About Stoneyard
1.2 What Makes It Natural
1.3 Flats and Corners
1.4 The Five Shapes
1.5 Major Color Lines
1.6 Benefits at a Glance - Design Decisions, Mockups & Samples
2.1 Why Start with a Mockup
2.2 Ordering Samples
2.3 Choosing an Installation Style - Calculating Quantity and Waste
3.1 Measuring Basics
3.2 Flats vs Corners
3.3 Waste Factor by Shape
3.4 Online Calculators
3.5 Worked Example - Where It Can Be Installed
- What It Goes On & When Waterproofing Is Needed
- Joint and Grout Options
- Trimming and Shaping the Stone
- Mixing and Applying High-Bond Mortar
- Finishing and Cleaning
- Common Issues and How to Avoid Them
- Specifications, Submittals & References
- Support & Next Steps
Appendices A–E · Checklists · Safety · Alternates · References · Specs
How to Install Stoneyard Natural Thin Stone Veneer 1
Installation Step 1 — How to Prepare the Surface
Installation Step 2 — How to Trim Natural Thin Stone Veneer
Installation Step 3 — How to Adhere Natural Thin Stone Veneer
Installation Step 4 — How to Point Natural Thin Stone Veneer
Installation Step 5 — How to Clean Natural Thin Stone Veneer
1. What Is Natural Thin Stone Veneer
1.1 About Stoneyard
- Stoneyard sources and processes real New England stone—granite, schist, quartzite, and fieldstone—cut and split thin for easier handling and installation.
- Each piece shows the same color through its full depth. No dyes, coatings, or manufactured textures.
- Every stone comes from quarries and reclaimed walls within the region, giving projects an authentic local look.
Note: Natural stone ages with the building. It can be cleaned or refinished decades later without fading or delaminating.
1.2 What Makes It Natural
- Composition: 100 % real stone, not cement or resin.
- Durability: Resists UV, fire, freeze–thaw, and abrasion.
- Color integrity: Mineral color runs through; it will not peel or wear off.
- Environmental value: Lower embodied energy than cast veneers; recyclable at end of service life.
- Authenticity: Each piece has a natural surface created by hand- or machine-splitting.
PRO TIP
Choose real stone when long-term durability, fire resistance, and natural color variation matter most.
1.3 Flats and Corners
Thin stone veneer is produced in flats and corners to maintain a natural, full-bed appearance once installed.
- Flats cover the wall surface, measured in square feet (ft²) .
- Corners wrap edges and openings, measured in linear feet (lf) .
- Corner pieces have an “L” shape, returning 3–4 in. to hide seams.
PRO TIP
Order corners first, then calculate flats from the remaining area. Corners set the color blend and keep transitions seamless.
1.4 The Five Shapes
Each shape changes the wall’s rhythm and style. All shapes are cut from the same stone stock.
| Shape | Description | Typical Use |
|---|---|---|
| Ledgestone | Thin, linear strips (1–2 in. high) with tight joints. | Modern or transitional designs. |
| Square & Rectangular | Clean blocks (2–6 in. high) for patterned coursing. | Traditional or institutional facades. |
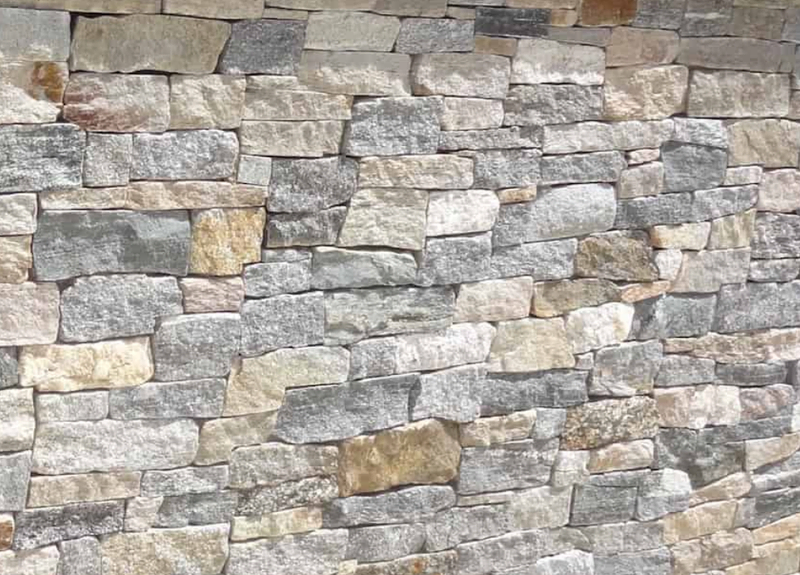
| Ashlar | Mixed rectangles and strips; random height coursing. | Rustic and classic New England look. |
| Mosaic | Irregular triangular or polygonal pieces. | Informal walls and fireplaces. |
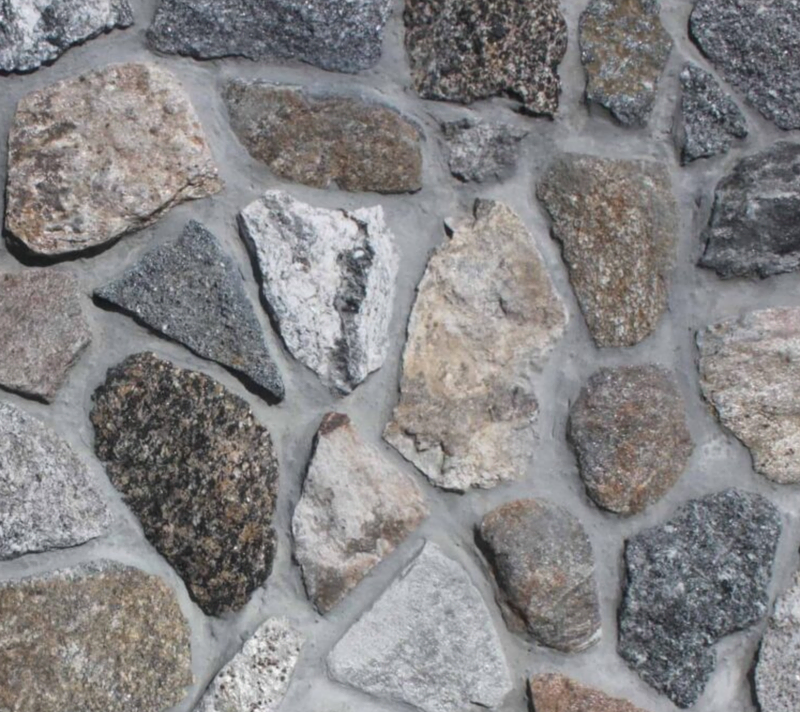
| Round | Naturally weathered fieldstone faces. | Cottage and historic restorations. |
Note: Shape influences joint width and waste factor. Always confirm appearance with a mockup before ordering.
1.5 Major Color Lines
Each color comes from a distinct New England source, offering a range of natural textures and tones that can be mixed and matched across flats and corners for custom designs.
- Boston Blend — a genuine New England fieldstone, not quarried. It’s a dense glacial conglomerate composed of granite, feldspar, quartzite, and other native stones deposited during the last Ice Age. Its natural mix of earth tones and grays gives it the most classic and varied appearance.
- Colonial Tan — primarily quartzite with traces of mica and feldspar. It produces warm golden-brown hues and subtle sparkle, pairing well with wood or neutral siding.
- Greenwich Gray — quarried schist and granite in medium-gray tones with cool blue undertones and a consistent split texture.
- Vineyard Granite — quarried granite featuring rosy-gray coloration with visible mica for reflective highlights.
- Newport Mist — quarried granite with a light-gray base and fine white veining for a crisp, modern look.
- Oyster Bay — quarried schist with soft gray-green body color and light cream highlights that shift under changing light.
- Homestead™ is a curated collection of more than twenty thin stone veneer colors and shapes that expand beyond the traditional color lines, offering additional textures and tones for greater design flexibility.
Remember
Blend stones from multiple crates during installation for natural color variation and a balanced overall tone.
1.6 Benefits at a Glance
- Durable: Real stone resists freeze–thaw, UV, and impact.
- Lightweight: 1 – 1¼ in. thick and ≈ 13–15 lb/ft²; installs on most wall types.
- Versatile: Interior or exterior, new construction or renovation.
- Non-combustible: Ideal for fireplaces and stove surrounds.
- Low maintenance: No sealing required for most applications.
- Authentic look: Same texture and depth as full-bed stone.
- Sustainable: Local material and minimal waste.
2. Design Decisions, Mockups & Samples
Planning before installation ensures a consistent look and fewer surprises on-site.Natural thin stone veneer is hand-split, so every piece has unique color and texture. Design and layout choices made early will determine how your finished wall feels — refined, rustic, or modern.
2.1 Why Start with a Mockup
A mockup is a small, representative section of wall that allows you to confirm layout, joint width, mortar color, and overall tone before full installation. It acts as both a design reference and a quality control standard for the rest of the project.
Mockups help you:
- Approve color blend and shape ratio.
- Test joint style and mortar color under real light.
- Align client, designer, and mason expectations.
- Prevent costly rework on large areas.
PRO TIP
Build your mockup using actual site conditions — same substrate, mortar, and lighting — to match how the wall will perform and appear once installed.
2.2 Ordering Samples
Samples show true stone color and surface texture, but keep in mind that every piece of natural stone varies. Order both flats and corners in your chosen color line so you can see how the pieces meet and blend.
Sample best practices:
- Request at least two square feet of flats and two linear feet of corners .
- Lay samples on a neutral background outdoors for natural light evaluation.
- Compare dry and lightly misted stones — color depth increases slightly when wet.
- Store approved samples as your job standard for color reference during installation.
Note: Use samples to communicate expectations with clients and installers — they become your on-site reference standard once work begins.
2.3 Choosing an Installation Style
Your installation style defines the finished character of the wall. Each shape can be installed tight-jointed, standard-jointed, or over-grouted for different visual effects.
Common styles:
- Tight-Jointed (Dry-Stack): Minimal or no visible mortar; modern, clean lines.
- Standard ½ Inch Joint: ½-inch mortar joint; balanced and traditional look.
- Wide or Over Grout: Mortar slightly overfilled or brushed for a rustic texture.
Other Styles:
- Flush Joint: Mortar level with stone surface for a smooth, monolithic finish.
- Trowel-Struck Joint: Mortar struck while wet for a clean, slightly glossy appearance.
- German Schmear: Mortar smeared across stone faces for a soft, aged look.
- Beaded / Convex Joint: Rounded mortar bead along joint line for a classic, detailed profile.
More Joint Details Here
Note
Joint and mortar color affect the perceived tone of the stone. Lighter grout contrasts and highlights each piece; darker grout unifies and deepens the color field.
Tight-jointed (dry-stack)

Standard ½ inch joint
Wide or Over Grout Joint
Decide on joint style and mortar color before ordering stone — it determines how much material you’ll need and how the final color reads in natural light.
3. Calculating Quantity and Waste
Getting the numbers right before you start is the difference between finishing strong and scrambling for more stone. This section explains how to measure, account for corners and waste, and check your totals using Stoneyard’s online tools.
3.1 Measuring Basics
- Measure Each Surface:
Use a tape measure to find the height and width of every wall or surface you plan to cover. Multiply height × width to get the square footage (SF) for each.
Add up the totals from all areas. - Subtract Openings:
Deduct the area of windows, doors, vents, or other cutouts.
Example:
Wall: 10 ft × 20 ft = 200 SF
Door: 3 ft × 6 ft = 18 SF
Net Wall Area = 182 SF - Record Separately:
Keep walls, columns, and fireplace faces listed individually. This helps you plan your pattern and order more precisely.
PRO TIP:
Always round up to the nearest whole number—stone cuts rarely line up perfectly.
3.2 Flats vs Corners
Flats are sold by the square foot. Corners are sold by the linear foot.
- Flats: Cover the main wall surface.
- Corners: Wrap around edges and transitions for a full-depth appearance.
How to measure corners:
Add the vertical height of every outside edge.
If you have a column that’s 8 ft tall on each corner and four corners total:
8 ft × 4 = 32 linear feet (LF) of corners.
Conversion:
Each linear foot of corner stone covers about ¾ SF of wall area.
So, 32 LF of corners ≈ 24 SF of flats to subtract from your total wall footage.
3.3 Waste Factor by Shape
Every installation creates offcuts. How much depends on the stone shape and joint style :
| Stone Shape | Typical Waste Range | Notes |
|---|---|---|
| Ledgestone | 20–30% | Tight joints require more trimming. |
| Ashlar / Square & Rectangular | 10–15% | Moderate trimming; efficient layout. |
| Mosaic / Round | 5–10% | Wider joints and irregular fit reduce trimming. |
Joint style also matters:
- Dry-laid joints: 20–30% waste.
- Standard joints (3/8–¾ in): 10–15%.
- Overgrout joints: 5–10%.
Smaller accent walls or fireplaces trend toward higher waste. Long runs and continuous walls bring it down.
3.4 Online Calculators
Stoneyard provides two tools that simplify planning:
- Thin Veneer Coverage Calculator – Converts wall and corner dimensions into total stone required.
- Project & Waste Estimator – Adjusts for shape, joint type, and installation style.
Both are available under Resources → Stone Calculators on stoneyard.com/calculators
PRO TIP:
Use the calculator after you’ve chosen your joint type. A tight fit can easily add 10–15% more stone to your order.
3.5 Example
Goal: Cover a 10 ft × 20 ft wall with Boston Blend Ledgestone and two 8 ft outside corners.
Step 1 – Wall area: 10 × 20 = 200 SF
Step 2 – Corners: 2 corners × 8 ft = 16 LF
→ 16 × 0.75 = 12 SF corner coverage
→ 200 – 12 = 188 SF of flat stone needed
Step 3 – Waste: Ledgestone (25% waste)
188 × 1.25 = 235 SF to order
Step 4 – Corners: Order 16 LF separately.
Final order: 235 SF flats + 16 LF corners.
Summary Formula
Total Stone (SF) = (Wall SF – Corner Conversion) × (1 + Waste %)
Always build a 4 ft × 4 ft mockup panel before ordering the full quantity. It confirms your layout, reveals true waste, and locks in color balance.
4. Where It Can Be Installed
Natural thin stone veneer can be installed on almost any vertical surface, indoors or outdoors. It performs in all climates when paired with the right substrate, waterproofing, and mortar system.
4.1 Exterior Applications
4.1.1 Residential Exteriors
- Use for siding, foundations, entryways, chimneys, and outdoor living areas.
- Recommended substrates: poured concrete , CMU block , or framed walls with cement board .
- Apply LATICRETE MVIS Air & Water Barrier to protect against moisture before setting with MVIS Hi-Bond Masonry Veneer Mortar .
- Maintain 2 inches of clearance above grade or patios to avoid water damage and freeze–thaw cracking.
- For coastal or cold regions, choose Stoneyard Harsh Climate Approved (HCA) stones such as Boston Blend, Colonial Tan, Greenwich Gray, Oyster Bay, Newport Mist, Vineyard Granite, or Coastal Sand.

Pro Tip: Blend stone from multiple pallets to achieve an even color mix and natural pattern variation.
Warning: Do not install directly over plywood or house wrap—always use cement board or a stable masonry base.
4.1.2 Commercial and Institutional Buildings
- Ideal for large façades, schools, offices, and civic buildings.
- Install over structural CMU, poured concrete, or metal stud framing with exterior sheathing.
- Use a continuous air and water barrier , along with properly detailed flashing and weeps.
- Apply MVIS Hi-Bond Mortar for durable adhesion and flexibility in changing weather.
- Select HCA-rated quartzite or granite for maximum resistance to freeze–thaw cycles and impact.
- Include control joints every 20–30 feet on long or multi-story façades to allow for movement.
Note: Build a small on-site mockup wall to confirm joint width, color blend, and installation technique before starting the main project.
4.2 Interior Applications
4.2.1 General Interior Use
- Ideal for accent walls, fireplaces, stair towers, and feature areas.
- Install over clean drywall or cement board .
- Use MVIS Hi-Bond Mortar for bonding.
- Waterproofing is optional for dry rooms but required for bathrooms, kitchens, and spas .
- Lightly scuff or prime painted surfaces for better adhesion.
Pro Tip: Use angled lighting from above to highlight stone texture and shadow depth.
4.2.2 Fireplace Surrounds
- Suitable for both gas and wood-burning fireplaces.
- Install over masonry or cement board , keeping a 1-inch gap from the firebox .
- No waterproofing required indoors.
- Use MVIS Hi-Bond Mortar for secure bonding under temperature changes.
Note: Avoid sealing stone too soon after installation—allow 7 days for mortar to fully cure before applying any protective sealer.
4.3 Landscape and Specialty Features
4.3.1 Columns and Pillars
- Wrap with matching 90° corner pieces for a full-depth appearance.
- Alternate long and short pieces for a natural look.
- Dry-fit all corners before applying mortar.
4.3.2 Outdoor Kitchens, Firepits, and Bars
- Use exterior-grade cement board as the substrate.
- Apply a complete waterproofing system before installing veneer.
- Choose HCA-rated stones for outdoor exposure to heat, moisture, and UV rays.
- Apply full mortar coverage on each stone to prevent voids and water penetration.
4.3.3 Retaining Walls, Garden Features, and Water Elements
- Install over cast concrete or CMU walls only.
- Use quartzite or granite in high-moisture or freeze–thaw conditions.
- Keep stones and tools warm when working in temperatures below 40°F.
Warning: Do not install veneer on pressure-treated wood or foam substrates—they expand and contract excessively, causing bond failure.
Pro Tip: Include small drainage gaps at the base of retaining walls to relieve trapped moisture.
4.4 Below-Grade and Harsh Environments
4.4.1 Below-Grade Foundations and Walkouts
- Limit installation to concrete or CMU surfaces.
- Apply a continuous waterproofing membrane before installation.
- Include a drainage plane to manage hydrostatic pressure.
- Backfill carefully to avoid cracking, impact, or frost heave.
4.4.2 Cold and Coastal Climates
- Use HCA stones with low absorption and high density for freeze–thaw protection.
- Apply MVIS Air & Water Barrier over all exposed substrates.
- Ensure full mortar contact behind each piece to prevent trapped moisture.
- Add flashing around openings to protect against salt, wind, and rain.
Note: Granite and quartzite stones perform best near oceanfront, salted roads, or de-icing areas.
4.5 Summary by Application
4.5.1 Residential Exteriors
- Install over concrete, CMU, or framed walls with cement board.
- Use MVIS Air & Water Barrier and Hi-Bond Mortar .
- Maintain 2 inches above grade.
4.5.2 Commercial Buildings
- Use CMU or metal framing with sheathing and flashing .
- Choose HCA-rated stone for high durability.
4.5.3 Interior Walls
- Install on drywall or cement board.
- Waterproof only in humid rooms.
4.5.4 Outdoor Kitchens and Bars
- Use cement board and then waterproof.
- Apply full mortar coverage and select HCA stone .
4.5.5 Below-Grade Applications
- Apply only to concrete or CMU .
- Use a waterproof membrane and drainage system .
- Backfill slowly to avoid frost damage.
5. What It Goes On & When Waterproofing Is Needed
The strength and longevity of your thin stone veneer installation depend on what it’s attached to. Each surface type requires specific preparation to create a durable, watertight bond.
5.1 Approved Substrates
5.1.1 Poured Concrete and CMU Block
- Best base for thin stone veneer.
- Surface must be clean, dry, and free of dust, paint, or oil .
- Repair cracks or spalled areas before installing stone.
- Apply LATICRETE MVIS Air & Water Barrier directly to concrete or block.
- Set stone using MVIS Hi-Bond Masonry Veneer Mortar .
Pro Tip: Lightly dampen concrete before applying mortar to improve bond strength.
5.1.2 Cement Board
- Use ½-inch exterior-grade cement board such as PermaBase or HardieBacker.
- Fasten with corrosion-resistant screws to wood or metal studs.
- Stagger seams and leave a small gap between panels.
- Tape and fill joints with alkali-resistant mesh and mortar.
- Apply two coats of MVIS Air & Water Barrier before installing stone.
Warning: Do not use green board, drywall, or OSB behind the veneer. These materials absorb moisture and fail over time.
5.1.3 Existing Brick or Block Walls
- Suitable if the wall is structurally sound and unpainted .
- Clean with Prosoco Sure Klean Vana Trol to remove dirt or efflorescence.
- Repoint or repair any loose mortar joints.
- Apply MVIS Air & Water Barrier for exterior exposure.
- Set veneer using MVIS Hi-Bond Mortar for proper adhesion.
5.1.4 Metal Lath and Scratch Coat
- Use when installing over non-masonry surfaces .
- Attach galvanized metal lath over a weather-resistive barrier.
- Overlap seams by 1 inch and fasten every 6 inches.
- Apply a ½-inch scratch coat of mortar and let it cure for 24 hours before applying stone.
5.2 Surfaces That Are Not Approved
- Plywood, OSB, or drywall without cement board.
- Painted or sealed walls.
- Foam board or rigid insulation.
- Surfaces with active water leaks or structural movement.
Note: These surfaces can’t hold mortar properly and will cause delamination. Always re-skin with cement board or apply metal lath and a scratch coat first.
5.3 When Waterproofing Is Needed
5.3.1 Required Waterproofing
- Exterior walls, chimneys, and retaining walls.
- Outdoor kitchens and any surface exposed to rain or snow.
- Below-grade areas and basements.
Apply two coats of MVIS Air & Water Barrier , each 15–22 mils thick. Check thickness using a wet film gauge.
5.3.2 Optional Waterproofing
- Interior accent walls and fireplaces in dry environments.
- Concrete or CMU walls in conditioned indoor spaces.
Even when optional, waterproofing improves long-term protection and color stability.
5.4 Air and Vapor Control
5.4.1 Drainage and Ventilation
- Install weep screeds or vents at the base of exterior walls.
- Maintain a small air space behind the veneer when using a rainscreen system.
- Allow trapped moisture to drain or evaporate.
5.4.2 Flashing
- Use corrosion-resistant flashing above windows, doors, and wall transitions.
- Overlap flashing with the air and water barrier to shed water properly.
- Seal fasteners and seams with high-quality masonry sealant.
5.5 Surface Preparation Checklist
Before installing stone veneer:
- The substrate is clean, solid, and free of debris.
- All gaps and cracks are sealed.
- Waterproofing has dried for at least 24 hours.
- Installation temperature is between 40°F and 90°F .
- Tools, trowels, and mixers are clean and ready.
Pro Tip: Perform a quick “tape test.” Stick masking tape to the wall and pull it off. If dust comes with it, clean again before starting.
6. Joint and Grout Options
The mortar joint you choose changes how your finished project looks and performs. Some joints make the wall feel clean and modern, while others add a rustic, old-world texture. Choosing the right one depends on the project style, the shape of the stone, and the skill of the installer.
6.1 Overview
- Joints are the spaces between stones that are filled or finished with mortar.
- Joint size affects waste, installation speed, and water resistance.
- Three main styles are used in most installations: Dry-Laid , Standard , and Overgrout .
- All three options can be used indoors or outdoors.
Note: Always build a small mockup wall before starting to confirm the joint style and color you want.
6.2 Dry-Laid (Tight Fit) Joints
6.2.1 Description
- Stones are fitted closely together with little to no visible mortar .
- Mortar is recessed about ½ inch from the stone face or omitted entirely.
- Produces a clean, shadowed look that highlights stone texture.
- Most common for Ledgestone or Ashlar patterns.
6.2.2 Installation Tips
- Requires careful trimming and fitting of each piece.
- Best for interior walls or covered exteriors where moisture is minimal.
- Allow extra stone (20–30% waste) since tighter joints need more shaping.
Pro Tip: For an authentic dry-laid look, use smaller shims during layout to keep joints even before final mortar sets.
6.3 Standard (Concave or Recessed) Joints
6.3.1 Description
- The most balanced and widely used joint.
- Typical joint thickness ranges from ⅜ to ¾ inch .
- Mortar is recessed slightly from the stone face or finished flush.
- Works well with Mosaic , Ashlar , or Square & Rectangular shapes.
6.3.2 Installation Tips
- Allows moderate trimming and faster installation than dry-laid.
- Provides a good balance between modern and rustic style.
- Use MVIS Laticrete Pointing Mortar for consistent joint color and texture.
Warning: Avoid smearing mortar across stone faces—it’s easier to clean joints early than to remove hardened residue later.
6.4 Overgrout (Wide or Face Joint) Joints
6.4.1 Description
- Mortar overlaps part of the stone face for a weathered, historic look.
- Joints can range from 1 inch and wider .
- Commonly used with Round and Mosaic shapes.
- Hides irregular gaps and requires less trimming.
6.4.2 Installation Tips
- Apply mortar generously with a pointing trowel.
- Lightly brush the surface to blend mortar and stone after partial set.
- Produces a softer, “old wall” aesthetic ideal for cottages and traditional architecture.
Pro Tip: For outdoor overgrout projects, use a lighter mortar color—it reduces visible staining and blends well as the wall ages.
6.5 Joint Color and Texture Options
- Mortar color influences the entire wall appearance.
- Light gray or buff brightens the wall and makes stones stand out.
- Dark gray or charcoal adds contrast and depth.
- Tinted mortars can match or complement the stone for subtle variation.
- Light gray or buff brightens the wall and makes stones stand out.
- Use a small test panel to evaluate color once the mortar has cured.
- For texture, choose between brushed, raked, or flush finishes.
Note: Mortar color dries lighter than when it’s first applied—wait 24 hours before judging final tone.
6.6 Joint Maintenance
- Inspect joints yearly for cracks or gaps, especially in freeze–thaw zones.
- Repoint as needed with Laticrete MVIS Pointing Mortar .
- Clean stone faces using Prosoco Sure Klean Vana Trol for exterior stone and Prosoco Safety Klean for interiors
Pro Tip: Keep joint tools and brushes clean during installation. Mortar left on tools will harden and scratch finished joints later
7. Trimming and Shaping the Stone
Every natural stone is unique. Proper trimming and shaping ensure that each piece fits cleanly, maintains its natural appearance, and minimizes waste. This section explains how to safely cut and shape stone veneer for a professional finish.
7.1 Tools for Cutting and Shaping
7.1.1 Basic Hand Tools
- Thin Stone Veneer Hammer – For splitting and trimming smaller stones.
- Steel Base Splitter (Hardie) – For clean breaks on flat or linear cuts.
- Carbide Chipper or Rocko Chisel – For refining edges and shaping irregular pieces.
- Rock Pick or Mason’s Hammer – For detailed shaping and tapping stone into place.
Pro Tip: Use the hammer face to split and the blade edge to shape. Work slowly to keep the natural edge instead of creating sharp, artificial lines.
7.1.2 Power Tools (Optional)
- Masonry Saw or Grinder – Speeds up cutting on larger jobs.
- Always use a diamond blade rated for natural stone .
- Cut outdoors or in a well-ventilated space.
- Use water-fed saws when possible for cleaner, cooler cuts.
Warning: Always wear safety glasses, gloves, and a respirator when using power tools. Silica dust from stone can be hazardous to your lungs.
7.2 Preparing Stones Before Installation
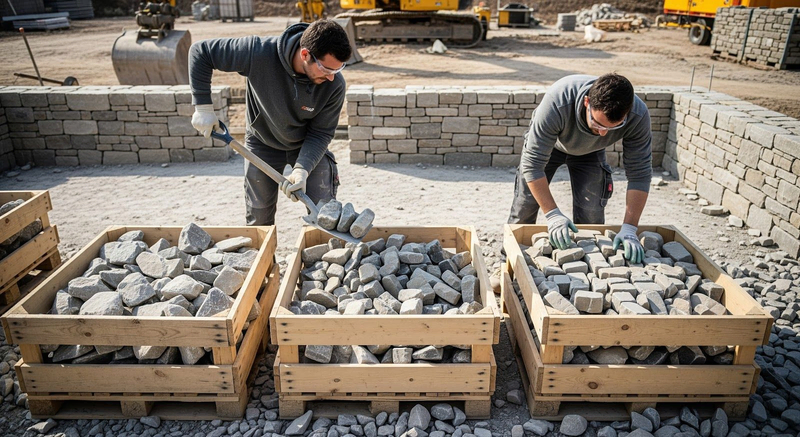
7.2.1 Sorting and Layout
- Lay out several square feet of stone on the ground before installation.
- Mix stones from multiple pallets to blend color and texture.
- Arrange shapes and sizes according to the chosen pattern (Ledgestone, Ashlar, Mosaic, etc.).
- Set aside corner pieces and larger stones for edges and transitions.
Note: Pre-sorting stones reduces time spent on the wall and helps keep joints even.
7.2.2 Dry-Fitting
- Dry-fit stones before applying mortar.
- Check balance, spacing, and fit around corners and edges.
- Trim as needed before mortaring.
7.3 Trimming Techniques
7.3.1 Scoring and Splitting
- Use a Veneer Hammer or Steel Base Splitter to score the face of the stone.
- Strike firmly but evenly along the score to split cleanly.
- Avoid over-chipping to maintain the natural edge.
7.3.2 Shaping
- Use Carbide Chippers or Rocko Chisels to shape irregular edges.
- Work from the back toward the face to protect the visible surface.
- Keep edges slightly rough for a natural fieldstone appearance.
Pro Tip: Rotate stones as you trim to visualize how they interlock on the wall. This saves time and reduces waste.
7.4 Fitting Around Openings and Corners
7.4.1 Windows, Doors, and Outlets
- Cut stones neatly around trim and openings.
- Leave small gaps for caulking or mortar joints.
- Use a grinder with a diamond blade for precise cuts.
7.4.2 Corners
- Use pre-cut 90° corners for a full-depth look.
- Alternate long and short corners for natural variation.
- For angled walls, use miter cuts or weave corners together for a seamless appearance.
Note: Always dry-fit corner stones first. Once mortared, adjustments are difficult.
7.5 Minimizing Waste
- Plan each cut to reuse offcuts where possible.
- Save leftover stones for patching or smaller fill areas.
- Expect about 10–15% waste for standard joints and up to 30% for tight dry-laid patterns.
Pro Tip: Keep a few extra boxes of stone from the same batch for future repairs or additions.
7.6 Safety Guidelines
- Wear gloves, safety glasses, dust mask, and hearing protection .
- Keep tools clean and sharp for safer, more accurate cuts.
- Secure all stones before cutting or chiseling.
- Work in a well-lit, stable area.
Warning: Avoid cutting stone indoors or in enclosed spaces. Dust from natural stone can cause serious lung damage.
8. Mixing and Applying High-Bond Mortar
Strong mortar is what anchors thin stone veneer to its substrate. Mixing it correctly and applying it evenly ensures the stone stays secure through heat, cold, and moisture changes.
8.1 Materials Needed
- LATICRETE MVIS Hi-Bond Masonry Veneer Mortar
- Clean 5-gallon mixing bucket or mortar pan.
- Drill with a paddle mixer or mortar hoe.
- Clean water (potable quality only).
- Margin trowel, notched trowel, pointing trowel, and grout bag.
Note: Always follow the manufacturer’s instructions on product packaging. Ratios and mixing times vary slightly with temperature and humidity.
8.2 Mixing the Mortar
8.2.1 Steps
- Pour clean water into the bucket first, then add dry mortar mix.
- Mix until smooth, with no lumps or dry pockets.
- Let mortar rest for 5–10 minutes , then remix briefly before use.
- Aim for a creamy, non-slumping consistency —thick enough to hold on a trowel, but soft enough to spread easily.
- Discard mortar that has started to harden or “skin over.” Never re-temper with water after initial set.
Pro Tip: Use smaller batches so the mortar stays fresh. Mix only what you can apply within 30–45 minutes .
Warning: Never add extra water to make hardened mortar workable again—it weakens strength and adhesion.
8.3 Applying Mortar to the Substrate
8.3.1 Preparation
- Ensure the substrate is clean, solid, and slightly damp (not wet).
- Verify that the waterproofing has cured completely.
- Check ambient temperature (between 40°F and 90°F ) and avoid direct sunlight during hot weather.
8.3.2 Application
- Use a notched trowel to spread mortar over the substrate at about ⅜ inch thickness .
- Apply mortar to a manageable area, roughly 5–10 sq. ft. at a time.
- Press firmly with the flat edge of the trowel to key mortar into the surface for strong contact.
Pro Tip: Use horizontal trowel strokes for better air escape behind the stone.
8.4 Back-Butter the Stone
8.4.1 Purpose
- Back-buttering fills irregularities in the back of the stone and ensures full contact with the wall.
- Reduces air pockets and prevents weak bonding.
8.4.2 How to Back-Butter
- Apply a thin layer of mortar to the back of each stone using a margin trowel.
- Press the stone onto the wall using a gentle twisting motion.
- Ensure mortar squeezes out slightly around the edges to confirm full coverage.
Note: Check occasionally by removing a stone to verify full contact between the mortar and the substrate.
8.5 Setting and Aligning Stones
8.5.1 Tips for Installation
- Start from the bottom and work upward in horizontal rows.
- Use corner pieces first, then fill in flats.
- Alternate stone sizes and shapes for natural variation.
- Maintain consistent joint spacing throughout the wall.
- Tap stones gently with the handle of your trowel to level and align.
8.5.2 Checking Bond
- Periodically pull off a newly set stone to check for at least 95% mortar contact .
- Reapply mortar if coverage is uneven or gaps are visible.
Pro Tip: Clean excess mortar from joints as you work. It’s much easier to remove before it hardens.
8.6 Curing Conditions
- Protect the wall from rain, freezing temperatures, or direct sun for at least 24–48 hours after installation.
- If temperatures drop below 40°F, use heated enclosures or insulated tarps.
- Keep mortar damp during the first day of curing in dry or windy conditions.
Warning: Premature drying or freezing can cause mortar to crack or lose adhesion.
8.7 Clean-Up and Inspection
- Clean tools, buckets, and mixing paddles immediately after use.
- Inspect finished areas for consistent joints and solid contact.
- Remove any mortar smears with a stiff brush and water before they harden.
- Allow full curing for 7 days before sealing or applying final finishes.
Pro Tip: Photograph your finished mockup or first wall section for future color and joint reference.
9. Finishing and Cleaning
Finishing gives your stone veneer its final character. Proper cleanup, joint tooling, and curing protect the beauty of the stone and the integrity of the installation.
9.1 Finishing the Joints
9.1.1 Timing
- Begin joint finishing when the mortar is firm but not fully hardened —typically 30 to 60 minutes after placement.
- Touch lightly with your finger; it should hold its shape without sticking.
9.1.2 Tools
- Use a jointing tool , grout bag , or pointing trowel for standard joints.
- For overgrout styles, use a rounded or gloved hand to smooth the surface.
- Avoid metal striking tools that could chip the stone edges.
9.1.3 Finishing Method
- Fill all joints completely, eliminating voids or gaps.
- Lightly brush the joints with a soft masonry brush once the mortar has started to stiffen.
- Remove loose particles and shape the joints to the desired depth.
Pro Tip: Keep mortar joints slightly recessed from the stone face to accentuate the texture and shadows of natural stone.
9.2 Cleaning the Stone Surface
9.2.1 During Installation
- Wipe off small mortar smears immediately using a damp sponge or soft brush.
- Never let mortar dry on the stone face—it can permanently stain textured surfaces.
- Use clean water and rinse often to avoid spreading residue.
9.2.2 After Installation
- Once the wall has cured for 7 days , perform a full cleaning if needed.
- For natural stone, use Prosoco Sure Klean Vana Trol for gentle cleaning and efflorescence removal.
- Dilute according to the manufacturer’s directions.
- Apply with a soft brush, scrub lightly, then rinse thoroughly with clean water.
Warning: Do not use acid-based cleaners or power washers. They can etch, discolor, or loosen stone veneer.
Note: Always test any cleaning product on a small, hidden area first to confirm compatibility.
9.3 Sealing (Optional)
9.3.1 When to Seal
- Sealing is optional but beneficial in harsh or high-traffic environments.
- Apply sealer after the mortar has fully cured —minimum 7 days, ideally 14.
- Recommended for areas exposed to water, de-icing salts, or grease (outdoor kitchens).
9.3.2 How to Seal
- Use a breathable, penetrating sealer designed for natural stone.
- Apply evenly with a pump sprayer, roller, or brush.
- Wipe away any excess before it dries on the surface.
- Allow 24 hours to cure before exposure to rain or cleaning.
Pro Tip: Use a matte-finish sealer to preserve the natural appearance. Gloss sealers can darken or alter the color of the stone.
9.4 Final Inspection
- Verify all joints are filled and consistent in color and depth.
- Confirm stone surfaces are free of mortar haze or residue.
- Check transitions, corners, and flashing for proper water shedding.
- Review drainage points and weep areas for obstructions.
- Clean tools and worksite thoroughly before removing scaffolding or protection barriers.
Note: A well-finished wall should show depth, natural variation, and tight-fitting joints—no visible mortar smears or uneven lines.
9.5 Maintenance Tips
- Inspect stone veneer annually for cracks, open joints, or damaged sealant.
- Clean gently with a soft brush and mild detergent as needed.
- Re-seal surfaces every 3–5 years if previously sealed.
- Avoid pressure washing, harsh chemicals, or wire brushes.
- Replace any loose stones promptly using the same MVIS Hi-Bond Mortar for consistency.
Pro Tip: Photograph the finished wall after cleaning—it’s a useful reference for future maintenance or repairs.
10. Common Issues and How to Avoid Them
Even with the best materials, thin stone veneer can fail if installed incorrectly. Knowing what can go wrong—and how to prevent it—saves time, money, and callbacks.
10.1 Poor Bond or Stone Falling Off
Cause:
- Dusty, dirty, or painted surfaces.
- Mortar applied too thin or allowed to dry before stone placement.
- No back-buttering or insufficient coverage.
Prevention:
- Always clean and slightly dampen the substrate before applying mortar.
- Apply ⅜ inch of MVIS Hi-Bond Mortar to the wall and back-butter each stone.
- Press firmly with a twisting motion to create full contact.
- Maintain curing temperatures between 40°F and 90°F .
Pro Tip: Pull a stone off occasionally to check for 95% mortar contact . Gaps mean weak adhesion.
10.2 Efflorescence (White Staining)
Cause:
- Moisture draws salts to the surface as it evaporates.
- Trapped water behind the veneer or unsealed mortar joints.
Prevention:
- Use MVIS Air & Water Barrier and proper flashing.
- Slope surfaces away from walls to avoid standing water.
- Let the new mortar cure fully before cleaning.
Fix:
- Rinse lightly with clean water or use Prosoco Sure Klean Vana Trol .
- Avoid harsh acids that can damage stone.
Note: Efflorescence is cosmetic and temporary if the wall is watertight.

Efflorescence (White Staining)
10.3 Cracked or Loose Joints
Cause:
- Mortar cured too quickly due to wind, heat, or direct sun.
- Freeze–thaw cycles before full cure.
- Movement from settling or poor substrate preparation.
Prevention:
- Keep walls shaded and mist joints during hot, dry conditions.
- Protect from freezing for at least 48 hours after install.
- Use proper control joints every 20–30 feet on long runs.
Warning: Never install veneer on flexible or unstable framing—cracks will reappear.
10.4 Uneven Color or Patchy Appearance
Cause:
- Stones not blended from multiple pallets.
- Uneven joint finishing or inconsistent mortar color.
- Efflorescence or water intrusion in certain areas.
Prevention:
- Mix stones from several crates before starting.
- Maintain even joint depth and tooling.
- Use consistent mortar batches to avoid color shift.
Pro Tip: Build a 4 ft × 4 ft mockup panel and get approval before full installation. It becomes your visual standard for color and texture.
10.5 Water Penetration or Freeze Damage
Cause:
- Missing flashing, gaps in waterproofing, or improper weep screeds.
- Mortar joints left open or poorly sealed.
Prevention:
- Apply MVIS Air & Water Barrier continuously over all substrates.
- Flash every penetration, opening, and transition.
- Keep weep screeds clean for proper drainage.
- Maintain 2 inches of clearance between veneer and ground level.
Note: Water damage doesn’t start with the stone—it starts behind it. Protect the wall, not just the face.
10.6 Staining or Mortar Haze
Cause:
- Mortar smeared on stone and left to dry.
- Overgrout joints not cleaned in time.
- Using dirty water or unwashed tools.
Prevention:
- Clean as you go—wipe mortar before it hardens.
- Use soft brushes and clean water only.
- Keep tools, sponges, and buckets clean throughout the job.
Fix:
- After full curing (7 days), clean lightly with Prosoco Sure Klean Vana Trol or a neutral pH cleaner.
10.7 Freeze–Thaw Spalling or Surface Flaking
Cause:
- Stone installed too close to grade or over a saturated substrate.
- Water freezing behind the veneer.
Prevention:
- Maintain ground clearance and proper waterproofing.
- Choose Harsh Climate Approved stones for exposed areas.
- Backfill with gravel or well-drained soil, never clay.
Pro Tip: For northern climates, use granite or quartzite veneer—both resist flaking and salt better than softer stones.
10.8 Misaligned Joints or Uneven Layout
Cause:
- Lack of planning or skipping the dry-fit step.
- Stones cut without regard to shape or joint consistency.
Prevention:
- Lay out the pattern on the ground first.
- Start at corners and work inward for balance.
- Step back every few rows to check alignment.
Note: Slight variation adds character—but uneven courses stand out once the wall is complete.
11. Specifications, Submittals & References
This section outlines the key technical standards, materials, and documentation used for natural thin stone veneer installations. Following these ensures your project meets professional and ASTM-approved requirements.
11.1 General Specifications
11.1.1 Material Composition
- Natural thin stone veneer is cut from full-depth building stone.
- Each piece is typically ¾ to 1½ inches thick .
- Average weight does not exceed 15 lb per square foot , allowing installation without a footing or ledge.
- All stone supplied by Stoneyard® is 100% natural, free of synthetic binders or concrete.
11.1.2 Environmental and Climate Suitability
- All Harsh Climate Approved (HCA) stones meet or exceed ASTM standards for freeze–thaw performance.
- Recommended for all New England and northern U.S. climates.
- Stones tested for durability, absorption, and density to withstand repeated freeze–thaw cycles.
Note: HCA stones include Boston Blend, Colonial Tan, Greenwich Gray, Oyster Bay, Newport Mist, Vineyard Granite, and Coastal Sand.
11.2 Installation Standards
11.2.1 Industry Standards
All installations should follow these recognized guidelines:
- ASTM C1780 – Standard Practice for Installation Methods for Adhered Manufactured Stone Masonry Veneer.
- ASTM C1670 – Standard Specification for Adhered Stone Masonry Veneer Units.
- ASTM C270 – Standard Specification for Mortar for Unit Masonry.
- MVMA (Masonry Veneer Manufacturers Association) Installation Guide – Best practices for substrates, lath, and mortar application.
11.2.2 Mortar and Adhesion Requirements
- Mortar: LATICRETE MVIS Hi-Bond Masonry Veneer Mortar or equivalent.
- Air & Water Barrier: LATICRETE MVIS Air & Water Barrier or equivalent.
- Minimum 95% coverage between stone, mortar, and substrate required.
- Mortar joint thickness should be between ⅜ inch and ¾ inch unless specified otherwise.
Pro Tip: Always perform a pull test on-site before full installation—this verifies mortar adhesion under field conditions.
11.2.3 Substrate Preparation
- Concrete, CMU, and cement board are the preferred substrates.
- For framed walls, use corrosion-resistant lath and a cured scratch coat.
- Ensure substrate is clean, structurally sound, and dimensionally stable.
Warning: Do not install veneer over painted or flexible surfaces without mechanical anchoring.
11.3 Submittals for Project Approval
11.3.1 Product Data
Include the following in project documentation:
- Manufacturer’s technical data for stone, mortar, and waterproofing materials.
- Safety Data Sheets (SDS) for all chemical components.
- Installation and maintenance instructions.
11.3.2 Sample Panel
- Build a minimum 4 ft × 4 ft mockup showing selected stone blend, joint style, and mortar color.
- Mockup serves as the standard of quality for appearance, layout, and joint depth.
- Approved mockup must remain on-site for comparison throughout the project.
11.3.3 Quality Assurance
- Installer should have a minimum of 5 years of experience with natural thin stone veneer.
- All materials must be stored in a dry, protected area .
- Installation temperatures must remain between 40°F and 90°F during and after installation.
11.4 Tolerances and Performance
11.4.1 Dimensional Tolerances
- Thickness: ±⅛ inch.
- Length and width: ±¼ inch typical.
- Corner returns: ±¼ inch.
11.4.2 Performance
- Freeze–thaw resistance tested per ASTM C666.
- Absorption rate ≤ 2.5% for granite and quartzite.
- Compressive strength exceeds 12,000 psi on average.
- Shear bond strength (with Hi-Bond Mortar) ≥ 50 psi.
Note: These properties vary by stone type. Check individual stone data sheets for precise test results.
11.5 References
11.5.1 Industry Publications
- Masonry Veneer Manufacturers Association (MVMA) Installation Guide.
- Tile Council of North America (TCNA) Handbook for Ceramic, Glass, and Stone Tile Installation.
- ASTM International standards (C1780, C270, C1670, C666).
- National Concrete Masonry Association (NCMA) Technical Notes.
11.5.2 Manufacturer Documentation
- LATICRETE MVIS System – Technical Data Sheet, product specifications, and mixing instructions.
- Prosoco Sure Klean – Product literature for stone cleaners and sealers.
- Stoneyard® Technical Bulletins – HCA test results, installation drawings, and safety information.
Pro Tip: Keep all ASTM references and approved submittals in one project binder for future warranty or inspection verification.
12. Support & Next Steps
Every installation is unique. Whether you’re working on a home, a commercial project, or a public space, Stoneyard provides the resources, training, and technical support needed to help your project succeed.
12.1 Stoneyard Support Team
12.1.1 Technical Help
- Get personalized guidance from the Stoneyard Technical Support Team on substrate preparation, mortar selection, and installation details.
- Call 978-742-9800 or email sales@stoneyard.com for direct assistance.
- Available Monday–Friday, 8:00 AM to 4:00 PM EST .
Note: Have your project name, stone type, and square footage ready when calling. This helps us provide faster, more accurate answers.
12.1.2 Architectural and Contractor Assistance
- Architects and Designers: Request CAD or BIM files, specification sheets, and texture swatches for planning and submittals.
- Contractors and Installers: Access training materials, on-site mockup guidance, and MVIS installation details.
- Dealers and Distributors: Contact Stoneyard for current product data sheets and point-of-sale materials.
Pro Tip: Register your company as a Certified Stoneyard Installer to receive technical updates and project referrals from our website.
12.2 Online Resources
12.2.1 Website Tools
Visit stoneyard.com to explore:
- Stone Visualizer: See how each stone looks in different styles and colors.
- Veneer Calculator: Estimate material quantity and waste by wall size.
- Installation Videos: Step-by-step tutorials for mixing mortar, trimming, and finishing stone veneer.
- Project Gallery: Browse hundreds of completed installations for design inspiration.
12.2.2 Downloadable Content
- Full PDF installation guide and cut sheets.
- ASTM specifications and HCA test results.
- Maintenance and cleaning recommendations.
- Safety Data Sheets (SDS) for all mortar and cleaning products.
12.3 Training and Continuing Education
12.3.1 Installer Workshops
- Hands-on training sessions at the Stoneyard Showroom in Littleton, MA.
- Learn cutting, blending, mortar application, and joint finishing from experienced masons.
- All workshops include demonstrations using MVIS Hi-Bond Mortar and Air & Water Barrier systems.
12.3.2 Virtual Training
- Watch live or recorded webinars covering installation basics and design options.
- Ideal for new installers, architects, and homeowners.
- Certificates provided for continuing education credit when applicable.
Pro Tip: Bring photos or drawings of your job site to workshops—our instructors will show you how to solve layout and substrate challenges before you start.
12.4 LATICRETE System Warranty
12.4.1 Warranty Coverage
- LATICRETE provides system warranties when approved MVIS products are used together, including Hi-Bond Masonry Veneer Mortar and Air & Water Barrier .
- Warranties cover adhesion, bonding, and water resistance when products are mixed and installed per manufacturer instructions.
- Contact LATICRETE Technical Services at 800.243.4788 for current warranty details and registration requirements.
Warning: Improper mixing ratios, use of non-approved materials, or poor curing conditions may void the LATICRETE warranty.
12.5 Next Steps
12.5.1 Before Ordering
- Review all measurements and waste factors.
- Confirm stone type, color, and joint style.
- Order 10–20% extra material to account for trimming and variation.
12.5.2 During Installation
- Reference this guide and confirm substrate readiness before applying mortar.
- Photograph your mockup and first wall sections for color and joint consistency.
- Keep contact information for technical support available on site.
12.5.3 After Completion
- Clean the wall using a gentle, stone-safe cleaner.
- Take final project photos for your records.
- Register your completed project with Stoneyard to be featured in the Project Gallery .
Pro Tip: A well-documented job—including photos, mockups, and material records—becomes a valuable reference for warranty claims and future client proposals.
12.6 Contact Information
Stoneyard® Inc.
2 Spectacle Pond Road
Littleton, MA 01460 USA
Phone: 978-742-9800 Email: sales@stoneyard.com
Website: stoneyard.com
Appendix A — Glossary of Terms
Air & Water Barrier
A liquid-applied coating that prevents moisture and air from entering the wall system before stone installation.
Back-Butter
Applying a thin layer of mortar to the back of each stone to improve bond strength and eliminate voids.
Base Course
The first row of stone laid at the bottom of the wall. It supports all courses above it.
Bond Strength
The measure of adhesion between stone, mortar, and substrate.
Cement Board
A rigid, moisture-resistant panel used over framed walls as a base for stone veneer.
Control Joint
A planned break in a wall that allows movement and prevents cracking.
Corner Piece
A pre-cut 90° stone used on outside corners for a full-depth, natural look.
Drainage Plane
An open space or layer behind the veneer that allows water to drain out.
Dry-Laid (Tight Fit)
A joint style where stones are fitted tightly together with little or no visible mortar.
Efflorescence
White salt deposits that appear on the surface when moisture evaporates through mortar or stone.
Flashing
A waterproof material installed at transitions, openings, or base areas to direct water away from the wall.
Freeze–Thaw Cycle
The repeated freezing and thawing of moisture within or behind stone, which can cause cracking if not properly managed.
Harsh Climate Approved (HCA)
Stoneyard designation for stones tested and proven to resist freeze–thaw damage and salt exposure.
Hi-Bond Mortar
A high-performance mortar used for adhering natural thin stone veneer to approved substrates.
Joint
The space between stones filled with mortar; can be tight, recessed, or overgrouted depending on style.
Lath
A metal mesh fastened to non-masonry walls that provides a surface for mortar to grip.
Mockup Panel
A small sample wall built before full installation to confirm stone layout, joint style, and color.
MVIS
Short for “Masonry Veneer Installation System,” a complete system by LATICRETE that includes waterproofing, mortar, and accessories.
Overgrout
A joint style where mortar extends slightly over the stone face for a rustic, old-world appearance.
Scratch Coat
The first layer of mortar applied over lath, combed horizontally to create a bonding surface for stone.
Substrate
The surface or wall structure that supports the stone veneer.
Weep Screed
A metal flashing installed at the bottom of exterior walls to allow moisture to drain from behind the veneer.
Waterproofing Membrane
A liquid or sheet material applied to block moisture from reaching the substrate.
Waste Factor
Extra material ordered (usually 10–30%) to account for cutting, trimming, and color variation.
Appendix B — Safety & Handling Guidelines
Installing natural thin stone veneer involves tools, lifting, and mortar mixing. Safe handling protects both workers and materials while ensuring a clean, professional jobsite.
B.1 Personal Protective Equipment (PPE)
- Eye Protection: Always wear ANSI-rated safety glasses or goggles when cutting or chiseling stone.
- Gloves: Use heavy-duty work gloves to prevent cuts and abrasions.
- Respiratory Protection: Wear an N95 or higher-rated respirator when cutting or grinding to avoid inhaling silica dust.
- Hearing Protection: Use earplugs or earmuffs when operating power saws or grinders.
- Footwear: Wear steel-toe or composite safety boots with slip-resistant soles.
Pro Tip: Keep a spare pair of dry gloves and a clean respirator on site—wet gear loses its protective value quickly.
B.2 Stone Handling and Lifting
- Lift with your legs, not your back. Stones can be heavier than they appear.
- Use both hands and keep the stone close to your body when carrying.
- Never toss or drop stone; it may chip or crack.
- Move stones in small batches to reduce fatigue and maintain control.
- Store pallets on level ground and cover them to protect from rain or contamination.
Note: A damp stone can slip easily—keep hands and gloves free from mud or mortar when lifting.
B.3 Cutting and Dust Control
- Cut outdoors or in a well-ventilated area away from other workers.
- Use wet-cut saws when possible to reduce airborne dust.
- Keep the work area clear of debris and water runoff.
- Clean saw tables and tools daily to prevent buildup.
Warning: Prolonged exposure to silica dust can cause permanent lung damage (silicosis). Always wear respiratory protection and follow OSHA guidelines for silica control.
B.4 Mixing Mortar Safely
- Always add dry mix into water, never the reverse.
- Mix slowly to avoid splashing.
- Keep hands and skin away from wet mortar—it can cause chemical burns.
- Clean tools and buckets immediately after use to prevent buildup.
- Store unused bags of mortar in a dry area, off the ground.
Pro Tip: If mortar splashes into eyes or on skin, rinse immediately with clean water and seek medical attention if irritation continues.
B.5 Jobsite Organization
- Keep walkways clear of hoses, cords, and debris.
- Stack stone and tools neatly to prevent tripping hazards.
- Maintain good lighting when working indoors or in shaded areas.
- Protect finished areas with plastic or drop cloths when mixing or cutting nearby.
Note: A clean jobsite not only prevents injuries but also speeds up installation and reduces rework.
B.6 Weather Considerations
- Avoid installation below 40°F or above 90°F.
- Protect fresh mortar from direct sunlight, wind, and freezing temperatures.
- Use heated enclosures or shade tarps as needed.
- Cover newly installed walls during rain or overnight cooling.
Warning: Never use chemical accelerators or antifreeze compounds not approved by the mortar manufacturer—they can weaken the bond.
B.7 Emergency Preparedness
- Keep a first aid kit and eyewash station accessible.
- Train all workers on site-specific emergency procedures.
- Have fire extinguishers rated for Class A and C hazards nearby.
- Post emergency phone numbers and site address clearly.
Pro Tip: Review safety procedures at the start of each day. A quick safety talk prevents small risks from becoming major accidents.
##END##