5 Common Mistakes In Thin Stone Veneer Installation
Thin stone veneer adds a touch of nature to any space, but achieving a flawless installation requires careful planning and execution. Unfortunately, several common pitfalls can mar the beauty and functionality of your veneer. To ensure your project looks its best for years to come, be aware of these five common mistakes in thin stone veneer installation and take steps to avoid them.
Mistake #1: Efflorescence
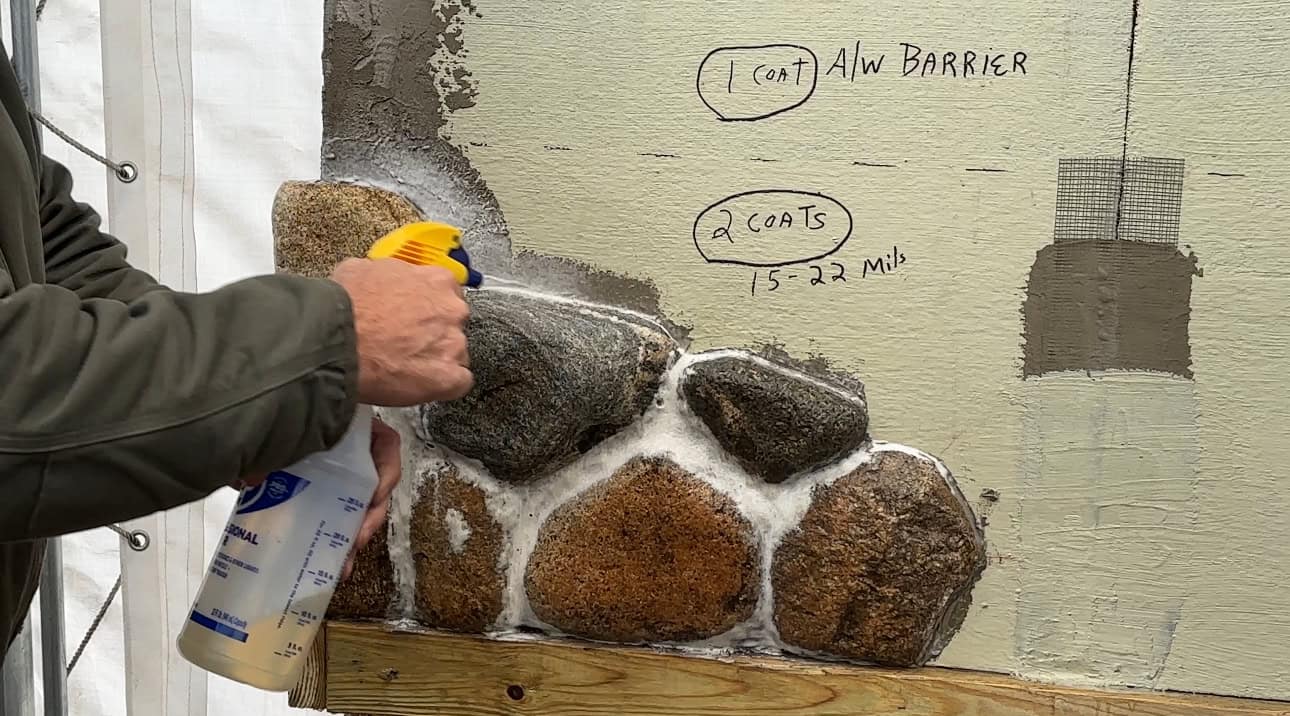
When water passes through the stone, it creates a white-powdery substance on the face of the stone known as efflorescence. To avoid efflorescence, you must be sure to waterproof as part of the first step of installation. We recommend applying two coats of Laticrete MVIS Air and Water Barrier at a desired thickness of 15 to 22 Mils per coat to the surface you are applying the stone.

You should waterproof for any exterior projects, as well as any interior projects where water exposure is possible. This includes kitchen backsplashes, bathrooms, or shower walls.
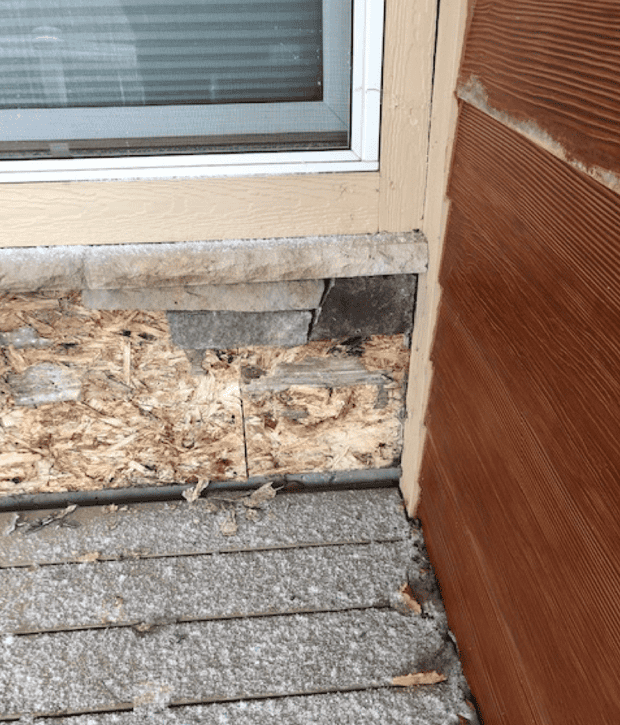
Mistake #2: Applying Stone Veneer Directly to Plywood
Aside from waterproofing, we recommend installing cement board over any exterior wall to which you plan to install stone. Applying stone veneer directly to plywood could result in failure. When water permeates through the stone and plywood, it causes the plywood to expand. If this occurs, the stone veneer will fall off the surface.
We recommend installing cement board over plywood, masking the joints and screw holes, and then applying two coats of air and water barrier.
Mistake #3: Using the Wrong Bonding Agent
To ensure that your stone project is durable and long-lasting, you should select a strong bonding agent. Oftentimes failures are a result of using mortars such as Type S that do not have the strength to hold stone for many years. We recommend Laticrete’s Hi-Bond Masonry Veneer Mortar for installation. This product has 500 psi. The bonding agent is in the mix, just add water and mix properly and you are ready to attach the stones.

Sometimes installers will accidentally confuse products and use Laticrete Pointing Mortar to adhere the stone to the surface. Be sure to check the label and ensure you are using Hi-Bond Mortar to adhere and the Pointing Mortar for filling the joints.
Mistake #4: Not Trimming the Stone Veneer
When installing natural thin stone veneer, you should never assume that every piece of stone will fit together perfectly. Trimming is inevitable.

Trimming thin stone veneer offers a surprising amount of creative control during installation. Unlike full-size stone, the thin profile allows for clean cuts and shaping, letting you achieve a customized fit around windows, outlets, or other architectural features. Back cutting the stones will give the joint a broken natural edge. The trimming process ensures a seamless look for your final design.
Mistake #5: Forgetting to Clean the Stone Veneer
The most common mistake in the thin stone veneer installation process is skipping the final step: cleaning. As small as this step sounds, the end result has a huge impact on the finished product. It’s important to be neat during the installation process, but with trimming and using mortar, dirt and dust is inevitable. Using a safe acid like Prosoco Vana Trol or Safety Klean to clean the stone will reveal the true colors of the stone and leave a sparkling finish.
By avoiding these common mistakes and following proper installation techniques, you can take pride in the beauty and durability of your thin stone veneer project. Remember that taking the time to do it right the first time will save you time and ensure your veneer continues to impress for years to come. For more information on stone installation, check out our other posts on thin stone veneer installation.