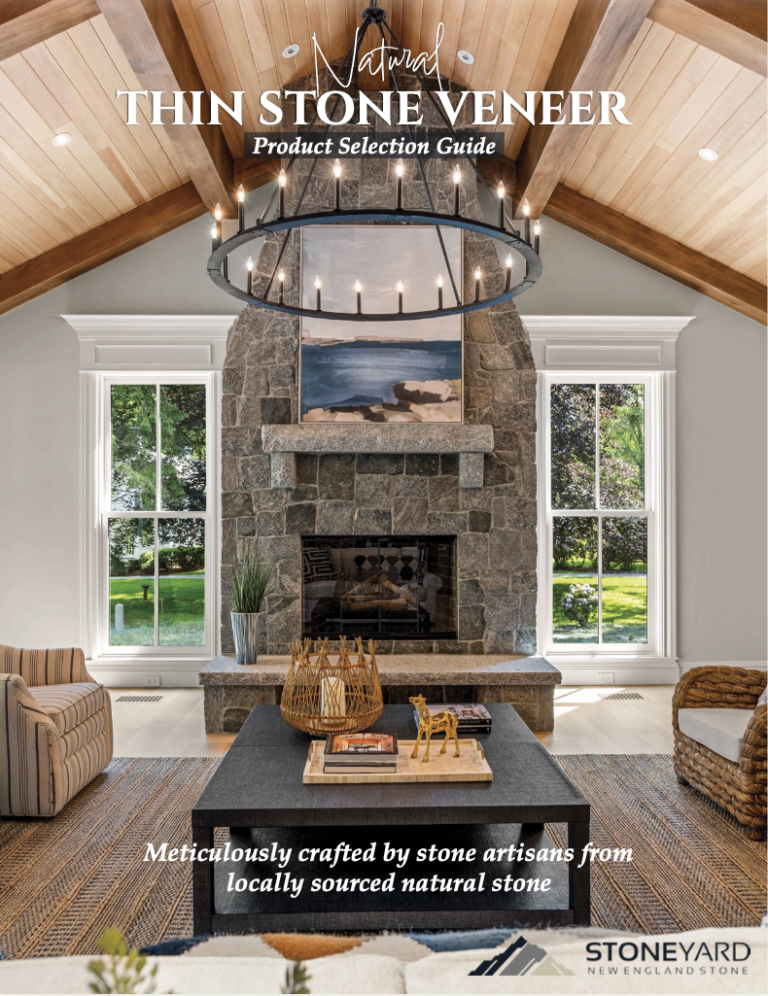
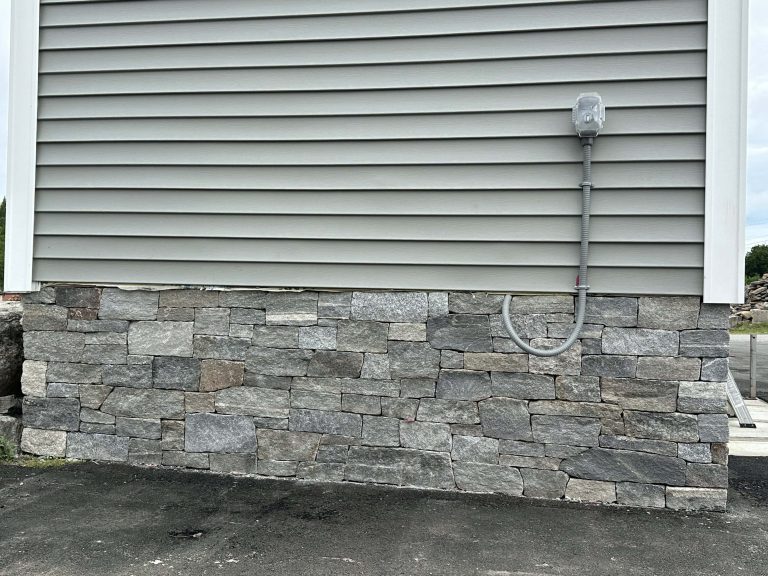
Retaining Wall with Stone Veneer: A Complete Guide
A retaining wall finished with natural stone veneer combines the structural strength of a concrete or block core with the timeless appearance of real stone. The process involves building a solid retaining wall, then applying New England thin stone veneer—real stone sawn to approximately 1 inch thick—to the visible face. This method achieves an authentic, full-depth masonry look without the immense weight and cost of using full-bed building stone.
Designing a Durable Retaining wall for Stone Veneer
A successful stone-clad retaining wall is engineered from the ground up, long before the first piece of veneer is set. The design phase is critical for creating a structure that handles both the hydrostatic pressure from retained earth and the harsh realities of a New England climate.
Proper planning begins with site analysis, including soil stability, groundwater conditions, and grade slope. These factors determine footing depth, reinforcement needs, and drainage design—all non-negotiable elements for a wall built to last for decades.
Choosing the Core Structure
The structural core provides the necessary strength for the wall. The two most common materials for this application are poured concrete and concrete masonry units (CMUs).
- Poured Concrete: This option delivers monolithic strength, making it ideal for taller walls or those under significant load. It requires forming but results in a solid, joint-free surface that is excellent for applying veneer.
- Concrete Masonry Units (CMU): CMU blocks are versatile and cost-effective. When properly reinforced with rebar and filled with grout, a CMU wall provides a durable, reliable base for real thin stone veneer.
Regardless of the core material, it must be engineered to support the combined load of the backfill and the weight of the real stone veneer.
The Advantage of Real Thin Stone Veneer
Stoneyard’s New England thin stone veneer offers a significant engineering advantage. We source 100% natural fieldstone and quarried stone, processing it at our Littleton, MA facility by sawing it to an approximate one-inch thickness. This profile provides the genuine appearance of traditional masonry at a fraction of the weight—typically less than 14 lbs per square foot.
This reduced dead load simplifies footing requirements and lessens the structural burden on the wall, often reducing material costs and labor without compromising the authentic appearance or durability of real natural stone.
This lighter weight makes it a practical choice for residential garden walls and large-scale commercial retaining structures alike. Because every piece is 100% real stone, it delivers authenticity and performance that manmade products cannot match. Unlike cement-based veneers from competitors like Eldorado Stone or Cultured Stone, our natural stone’s color and texture run through its entire body. It will never fade or delaminate.
Integrating Aesthetics and Function
The design must also consider how the wall integrates with the surrounding landscape. A retaining wall should be more than a structural necessity; it can be a key architectural feature. Looking at inspiring landscaping ideas for your outdoor space can provide concepts for creating a cohesive outdoor environment. For projects requiring the mass of full-bed stone, options for wallstone delivery to your job site are available.
Explore the full Stoneyard Thin Stone Veneer Collection — real New England stone, made in the USA.
Order free samples at https://stoneyard.com/stone-samples/ or schedule a virtual showroom visit at https://stoneyard.com/contact/.
Choosing the Right New England Stone Shape and Color
Selecting the right stone veneer is a critical decision that defines a retaining wall’s character and ensures it integrates naturally into the landscape. Whether the goal is the rustic charm of a fieldstone wall or a clean, contemporary look, the chosen shape and color blend are essential.
At Stoneyard, we source and craft all our stone at our facility in Littleton, MA, from 100% natural New England stone. Our five distinct shapes—Ledgestone, Ashlar, Square & Rectangular, Mosaic, and Round—each offer a unique texture and pattern. Paired with our five regional color collections, they provide versatile options for any architectural style.
Matching Stone Shape to Architectural Style
The shape of the stone creates the wall’s overall pattern. Some shapes produce clean, orderly lines, while others offer a more organic feel that appears timeless.
- Ledgestone & Ashlar: For crisp, horizontal lines, these rectilinear shapes are ideal. Ledgestone consists of thin, linear strips that create a tight, stacked appearance, well-suited for modern residential siding and commercial façades. Ashlar features taller courses for a larger-scale, stately impression that works well on substantial landscape walls and building exteriors.
- Square & Rectangular: This shape offers a timeless, classic look with blocky, uniform cuts. It delivers a formal and traditional feel, making it an ideal match for colonial-style homes, university campuses, and civic buildings where permanence is desired.
- Mosaic: To replicate the look of a hand-laid New England fieldstone wall, the irregular, angular pieces of our Mosaic shape are a perfect fit. It is well-suited for rustic retaining walls, chimneys, and other landscape features that need to blend with their natural surroundings.
- Round: This shape features weathered, cobblestone-style glacial stones common in historic New England. It is the natural choice for farmhouse foundations, lake homes, and heritage restorations requiring a historically accurate appearance.
The trend toward authentic, durable materials is industry-wide. The global market for retaining wall blocks, including natural stone, is projected to expand, driven by new construction and infrastructure projects. For more detail, you can find information on retaining wall block market trends on WiseGuyReports.com, highlighting the value builders place on high-performance materials.
Selecting the Right New England Color Blend
Once a shape is selected, the color blend brings the design to life. Our color collections are not artificial pigments; they are the result of New England’s natural geology, reflecting the true mineral composition of the region.
We offer five distinct color palettes:
- Boston Blend®: Our signature mix of gray, tan, and brown tones, adaptable to any style.
- Colonial Tan: A warm blend of gold and brown hues with a classic, coastal appeal.
- Greenwich Gray: A consistent, neutral gray palette ideal for modern and commercial aesthetics.
- Newport Mist: A soft mix of gray and white tones for a light, contemporary feel.
- Vineyard Granite: A gray-pink granite with mica sparkle, well-suited for rugged and coastal designs.
A successful design creates harmony between the stone, the building, and the landscape. A Vineyard Granite Mosaic retaining wall can anchor a coastal property, while a Greenwich Gray Ashlar wall can define a modern corporate campus.
Stoneyard Stone Shapes and Retaining Wall Applications
This guide matches our stone shapes to their visual characteristics and ideal applications for retaining walls, helping you visualize the final result.
| Stone Shape | Visual Characteristic | Ideal Application |
|---|---|---|
| Ledgestone | Thin, linear strips with tight horizontal lines | Modern residential walls, commercial entryways |
| Ashlar | Taller rectangular courses for a larger scale | Building facades, substantial landscape walls |
| Square & Rectangular | Uniform, blocky cuts for a traditional pattern | Colonial-style homes, university and civic projects |
| Mosaic | Irregular, angular pieces resembling fieldstone | Rustic garden walls, naturalized landscape features |
| Round | Weathered, cobblestone appearance | Farmhouse foundations, heritage restorations |
By combining shape and color, you ensure your retaining wall with stone veneer is both functional and a lasting feature of the property. Every piece of Stoneyard veneer is 100% real natural stone, Harsh Climate Approved (HCA), and built for New England’s toughest weather.
Explore the full Stoneyard Thin Stone Veneer Collection — real New England stone, made in the USA.
Order free samples at https://stoneyard.com/samples/ or schedule a virtual showroom visit at https://stoneyard.com/contact/.
How to Prep the Wall for Veneer Installation
A retaining wall with stone veneer is only as durable as its preparation. The steps taken before setting the first stone are critical to the project’s success, especially in New England where freeze-thaw cycles are a major factor. Proper surface preparation ensures a permanent bond and protects the wall’s core from moisture, delivering decades of performance.
The process begins with a clean, solid substrate. Whether working with poured concrete or CMU blocks, the wall surface must be free of dirt, oil, efflorescence, or anything else that could impede a strong bond. A pressure washer or a stiff wire brush is typically sufficient to prepare the surface.
Moisture Management and Weather Protection
Controlling water is the most critical aspect of preparing a retaining wall for thin stone veneer. A multi-layered defense against ground moisture and precipitation is non-negotiable for a lasting installation.
First, apply a high-quality weather-resistant barrier (WRB) directly to the concrete or block surface. This membrane acts as the primary shield, preventing water intrusion from reaching the structural core of the wall.
Next, install metal flashing at critical locations, particularly along the top of the wall where it meets the capstone and at the base where it joins the footing. Proper flashing directs water away from the wall assembly, preventing it from becoming trapped behind the veneer—a common cause of failure in cold climates.
Installing Metal Lath for a Mechanical Bond
Once the WRB is in place, install a galvanized, self-furring metal lath. This metal grid serves as the skeleton of the veneer system, providing a physical structure for the mortar to grip, creating a powerful mechanical bond.
Fasten the lath securely to the wall every six inches vertically, ensuring it is anchored into the masonry or studs. Overlap lath sheets by at least one inch at all seams to create a continuous, unified mesh. For complete technical details, consult our guide on preparing the surface for stone veneer.
The U.S. stone veneer market reflects a growing preference for authentic, durable materials. According to data from Fortune Business Insights, the market is projected to see continued growth, driven by both residential and commercial construction.
This infographic provides a simple overview of how to select the right stone, from shape and color to matching project style.
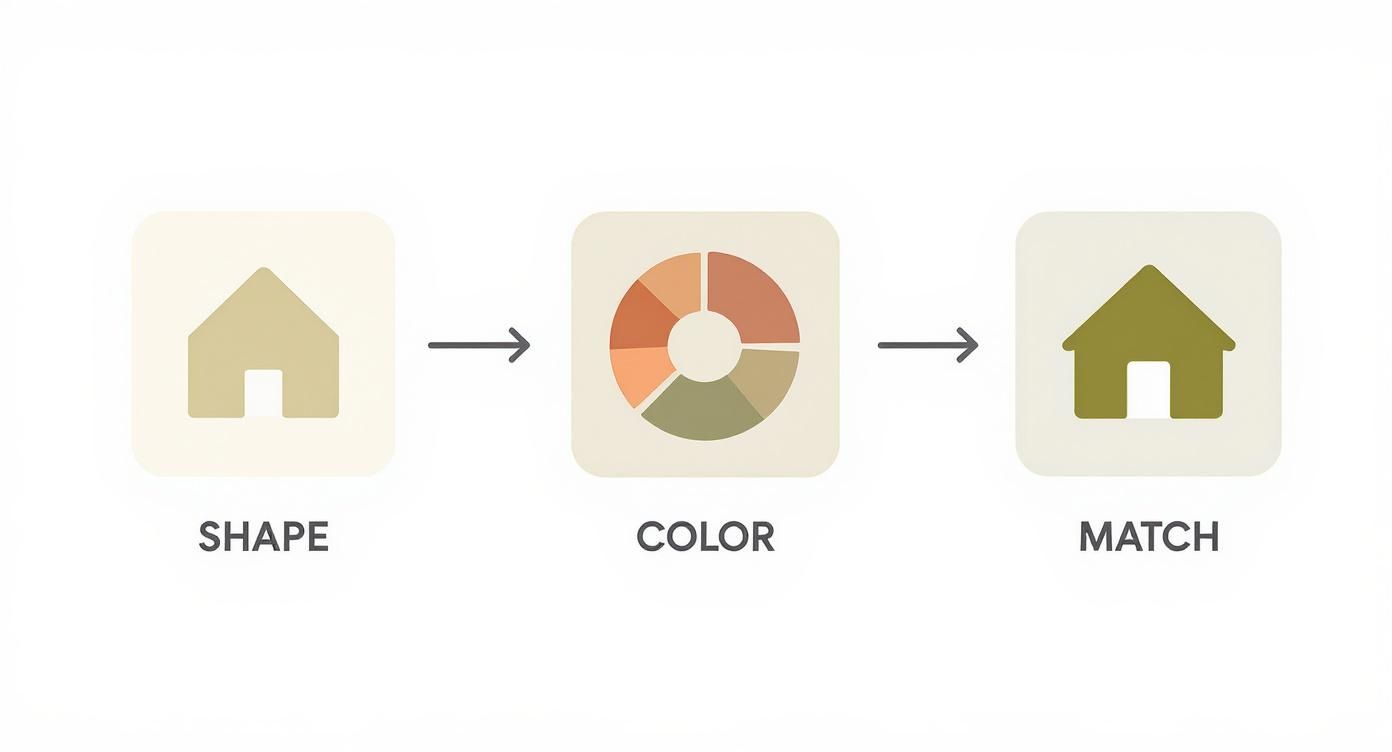
This illustrates that material selection is a foundational step that influences every other phase of the project.
Applying the Scratch Coat
The final preparation step is applying the scratch coat—a base layer of Type S or Type N mortar spread over the metal lath to a thickness of approximately ½ inch. The primary goal is to completely embed the lath in mortar, creating a solid, monolithic base for the stone.
While the mortar is still wet, use a notched trowel or scarifier rake to create deep, horizontal grooves across the surface.
These grooves, or “scratches,” are essential. They increase the surface area and create a mechanical key for the setting bed mortar to lock into, guaranteeing a permanent, powerful bond between the wall and the real stone veneer.
After scratching, allow the coat to cure for at least 24 to 48 hours. This curing period allows the mortar to gain sufficient strength before supporting the weight of the stone. This methodical preparation is the hallmark of a professional installation and is required for a Harsh Climate Approved (HCA) system that will stand the test of time.
Installing Stoneyard Natural Stone Veneer
With the wall properly prepared, the installation of the stone veneer begins. Setting real natural stone is fundamentally different from working with manufactured products. Unlike concrete veneers from companies like Coronado Stone or Eldorado Stone, which are cast from repetitive molds, each piece of Stoneyard veneer is unique in shape, color, and texture. This requires both technical skill and an artistic eye.
Use a high-quality Type S or N polymer-modified mortar. The polymers provide superior bond strength and improved workability. Mix the mortar to a smooth, creamy consistency—stiff enough to hold a stone without sagging, yet wet enough for full coverage.
Creating a Balanced Layout
A professional technique is to lay out stones on the ground before they are installed on the wall. This “dry-fitting” process is essential when working with natural stone. Spread out 15-20 square feet of stone flats to visualize the available range of colors and shapes.
This allows for the hand-selection of pieces to create a pleasing, organic pattern and helps avoid common installation issues:
- Color Clumping: Prevents accidental grouping of similar-colored stones, ensuring a natural blend across the wall.
- Running Joints: Makes it easier to stagger vertical joints and avoid undesirable “stair-step” patterns.
- Shape Repetition: Allows for a mix of sizes and shapes—especially important for Mosaic or Round patterns—to achieve an authentic, non-manufactured appearance.
This planning ensures the finished retaining wall with stone veneer has the genuine character of a traditional New England stone wall.
The Art of Setting and Shaping Stone
Begin setting stone at the bottom corners and work up and across the wall. Apply a consistent ½-inch layer of mortar to the entire back of each stone using a technique known as “back-buttering.” Achieving 100% coverage is non-negotiable; it creates a solid bond and eliminates voids where water could collect, freeze, and cause damage.
Press each stone firmly into the scratch coat with a slight wiggling motion. A small amount of mortar squeezing out around the edges indicates a good bond.
The ability to cut and shape real stone is a mark of true craftsmanship. While many pieces fit as-is, some will require trimming to fit tightly around corners or against capstones. A diamond blade on a wet saw or angle grinder provides clean, precise cuts.
This cannot be done effectively with faux concrete veneers, which often reveal their aggregate core when cut. The color and texture of Stoneyard stone are consistent throughout, so a cut edge appears as natural as the original face. For detailed technical specifications, the official Stoneyard Installation Guide is an excellent resource.
Installing Matching Corner Pieces
To achieve the appearance of a full-thickness stone wall, using matching corner pieces is essential. These L-shaped stones are crafted from the same material as the flats and are designed to wrap perfectly around outside corners.
As you work up the wall, alternate the long and short legs of the corner pieces to create a staggered, interlocking pattern identical to traditional masonry. This critical detail eliminates the flat, “pasted-on” look of inferior veneer installations. All Stoneyard veneer, including corners, is Harsh Climate Approved (HCA) and built to withstand New England weather.
Finishing Your Wall with Caps and Mortar Joints
The final details separate an adequate retaining wall from a professional one. Capping the wall and tooling the mortar joints are finishing touches that complete the aesthetic and add a critical layer of long-term durability, especially in New England’s climate.
These steps transform a functional structure into a polished architectural feature, ensuring your retaining wall with stone veneer performs as well as it looks for decades.
Protecting Your Wall with Capstones
A proper cap is the wall’s most important defense against water. Without it, rain and snowmelt can penetrate the wall’s core, causing significant damage during freeze-thaw cycles.
Capstones are typically large, flat stones set atop the wall with a slight overhang. This overhang creates a drip edge that directs water away from the veneer face, preventing staining and protecting the mortar joints below. High-quality natural stone caps are available from masonry suppliers and are a must for a professional installation.
A capstone functions as the roof of your retaining wall. It is a non-negotiable component that sheds water, protects the underlying structure, and provides a clean, finished line to the project.
Setting capstones securely in a strong mortar bed creates a sealed, weather-resistant top surface that enhances the longevity of the entire wall.
Mastering Mortar Joint Techniques
After the stone veneer and caps are in place, the final aesthetic choice is the mortar joint style. The treatment of the joints significantly impacts the wall’s final appearance, defining its texture, shadow lines, and overall character.
Tool the joints when the mortar is “thumbprint hard”—firm enough to hold a shape but still pliable. Tooling too early results in smeared joints; waiting too long makes the mortar too hard to shape.
Two primary joint styles are used for stone veneer walls:
- Raked Joints: Use a jointing tool to rake out mortar to a consistent depth, typically ¼ to ½ inch back from the stone face. This technique creates crisp shadow lines that accentuate the shape and texture of each stone. Raked joints are an excellent choice for a contemporary or formal look, pairing well with rectilinear shapes like Stoneyard’s Ledgestone or Ashlar.
- Overgrout Joints: Also known as a flush or rustic joint, this technique involves applying mortar over the edges of the stone faces and striking it off. The result is a more continuous, old-world surface that resembles traditional fieldstone masonry. It minimizes shadow lines and is ideal for creating a rustic feel with Mosaic or Round stone patterns.
Choosing the right joint technique is a critical finishing detail that should harmonize with the stone shape, color, and architectural style of the property.
Explore the full Stoneyard Thin Stone Veneer Collection — real New England stone, made in the USA.
Order free samples at https://stoneyard.com/stone-samples/ or schedule a virtual showroom visit at https://stoneyard.com/contact/.
Why Real Stone Is the Only Choice for a Lasting Retaining Wall
When building a permanent structure like a retaining wall, material selection is paramount. This is where the difference between genuine New England stone and manufactured alternatives becomes clear. While installation labor can be similar, the products themselves are fundamentally different, especially in a harsh climate.
Manufactured products, such as those from Eldorado Stone, Coronado Stone, and Cultured Stone, are cement-based veneers cast in molds. Their color is a surface-level application of pigments. After exposure to sun, rain, and freeze-thaw cycles, this artificial color can fade, chip, or peel, exposing the gray concrete aggregate underneath.
In contrast, every piece of Stoneyard natural thin stone veneer is solid stone, with color and character throughout its body. Sourced from New England’s quarries and fieldstone, its appearance is a product of regional geology. It will never fade. Instead, it develops a natural patina that improves with age.
Material Integrity and Durability
The key difference lies in the material’s density and composition. Natural stone is incredibly dense and has low porosity, making it resistant to water absorption. This is a critical advantage in New England, where freeze-thaw cycles can destroy weaker, more porous materials.
Manufactured concrete veneer is more porous and absorbs moisture. When this trapped water freezes, it expands, causing the material to crack, spall, and delaminate. This is a common failure point for faux stone in exterior applications.
Stoneyard’s Harsh Climate Approved (HCA) stone is tested for freeze-thaw durability. Its natural density and low water absorption guarantee multi-decade performance with minimal maintenance and no color fading.
The Myth of Cost Savings
The market for manufactured stone is driven by factors like lighter weight and a lower initial purchase price. However, this upfront cost can be misleading.
What these numbers do not account for is the total cost of ownership. When a manufactured veneer wall fails, the cost to remove and replace it will far exceed any initial savings.
Real stone is a one-time investment. It adds permanent, authentic value and curb appeal. A full breakdown is available in our article comparing the long-term performance of faux and natural stone veneer.
This direct comparison highlights the key material differences for retaining wall applications.
Natural Stone vs. Manufactured Stone for Retaining Walls
| Feature | Stoneyard Natural Stone Veneer | Manufactured Stone (Eldorado, Cultured Stone) |
|---|---|---|
| Color Source | Solid color throughout the stone | Surface-level stains and pigments |
| Fade Resistance | 100% fade-proof | Prone to fading and discoloration from UV exposure |
| Durability | Harsh Climate Approved; resists freeze-thaw damage | Porous; susceptible to cracking and spalling from moisture |
| Water Absorption | Very low | Higher; can trap moisture leading to failure |
| Long-Term Look | Develops a natural, attractive patina | Can chip or peel, revealing gray concrete underneath |
| Authenticity | Each piece is geologically unique | Repetitive patterns from molds can be noticeable |
The conclusion is clear: while manufactured stone may offer a lower initial price, natural stone provides the enduring strength, beauty, and long-term value required for a permanent structure.
Choosing real stone is a decision for permanence, authentic craftsmanship, and lasting performance that a factory-made product cannot match.
Explore the full Stoneyard Thin Stone Veneer Collection — real New England stone, made in the USA.
Order free samples at https://stoneyard.com/stone-samples/ or schedule a virtual showroom visit at https://stoneyard.com/contact/.