Using Laticrete MVIS Air & Water Barrier for the Installation of Stone Veneer
Applying stone veneer to an outdoor exterior surface can be quite a difficult task. It is essential to take necessary precautions to safeguard the structure against water penetration, This can potentially cause problems like the growth of mold or damage from rot.
Knowing how to properly install natural stone veneer is what sets an inexperienced mason apart from an experienced one.
The secret to achieving a beautiful and durable stonework finish lies in adequately preparing the underlying surface, which is where the Laticrete air and water barrier comes into play.
Without this essential step, achieving a flawless installation of exterior stone veneer requires that no water is getting behind the stone.
Waterproofing the Substrate for Exterior Stone Veneer Installation
If you’re planning to install stone veneer, there’s one crucial step that requires your attention.
Yes, we are talking about waterproofing the substrate.
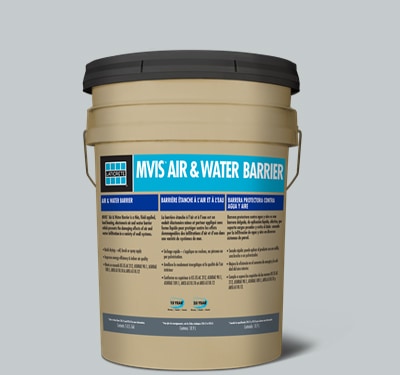
Applying first coat of LATICRETE’s Air & Water Barrier MVIS
The initial stage in proper stone veneer installation involves applying a layer of LATICRETE’s air and water barrier MVIS.
This high-performance product is designed specifically for masonry applications like installing stone veneers on substrates made from poured concrete or CMU blocks.
Drying time between coats
Patiently waiting for each coating to dry completely before moving forward ensures bonding protection. It also prevents any issues due to openings improperly installed with wet layers still present.
Note:
- A qualified installer ensures adequate drying times based on environmental conditions at hand. This can vary depending upon temperature and humidity levels at your location.
Application of second layer
Moving onto the next phase means adding another protective shield – yes, it’s time to apply mortar again.
To ensure proper installation and maximum protection against efflorescence (those unsightly white deposits), a second coat should be applied over dried areas after checking them thoroughly.
With this approach, even if moisture manages its way through natural stones used in stoneworks offers builders an additional line of defense.
Now that we’ve successfully prepared our substrate by following these steps diligently let us move towards understanding how thickness plays into achieving perfection when aiming full-stone-wall glory.
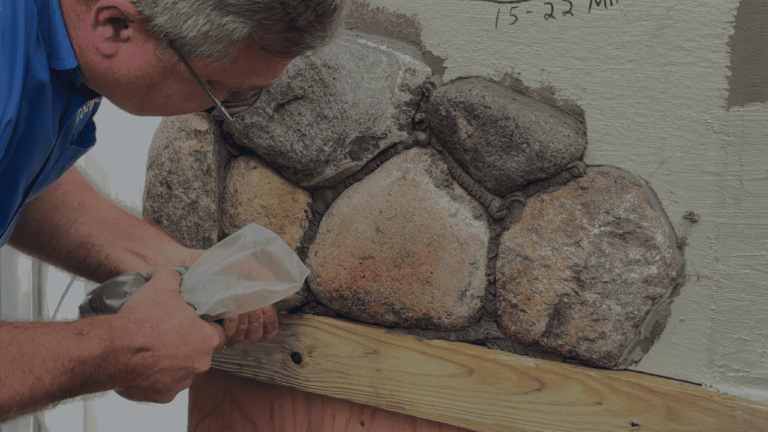
Checking Thickness with Wet Film Gauge
After the first layer of LATICRETE’s Air & Water Barrier MVIS is applied, it’s time to check its thickness.
This crucial step in stone veneer installation ensures that your structure has adequate protection against moisture damage.
Preparing for Measurement with a Wet Film Gauge
To begin, you’ll need a wet film gauge – an essential tool when installing stone veneer.
This simple device allows us to measure the thickness of our freshly applied barrier accurately and ensure proper installation.
Achieving Correct Thickness Levels
The ideal range we’re aiming for lies between 15 to 22 mils thick. It provides detailed insights into achieving this optimal level.
If done correctly by qualified masons, proper stone veneer installation ensures not only longevity but also bonding protection, which is key while dealing with natural stones like these.
Masonry applications require expertise as improper installations can lead to issues down the line such as openings improperly installed stone veneers causing potential damages or even failures due to water seepage, etc.
An accurate measurement using a wet film gauge during each coat application helps avoid such pitfalls, ensuring that your full-stone wall stands strong over years without any hiccups. So always remember: Measure twice, install once.
Strengthening Screw Holes with High Bond Cement
When installing stone veneer, it’s not just about the surface. It’s also what lies beneath.
The screw holes that hold your structure together need attention too.
Importance of Covering Screw Holes
Screw holes can be a weak point in any masonry application.
If left uncovered, they expose your stonework to potential damage and instability over time.
This is where high bond cement comes into play.
Using High Bond Cement Effectively
In fact, using this material as part of proper stone veneer installation ensures bonding protection for these vulnerable areas.
Start by applying a generous amount directly onto each screw hole. Then, smooth out the area ensuring there are no gaps or air pockets.
This creates a solid foundation upon which to install your natural stones.
A qualified installer will ensure all openings improperly installed stone veneers are covered up properly before proceeding further into the installation process.
Now that we’ve secured our base, let’s move on to hanging those beautiful stones. Get ready because next we’re going full steam ahead towards creating that stunning full-stone wall.
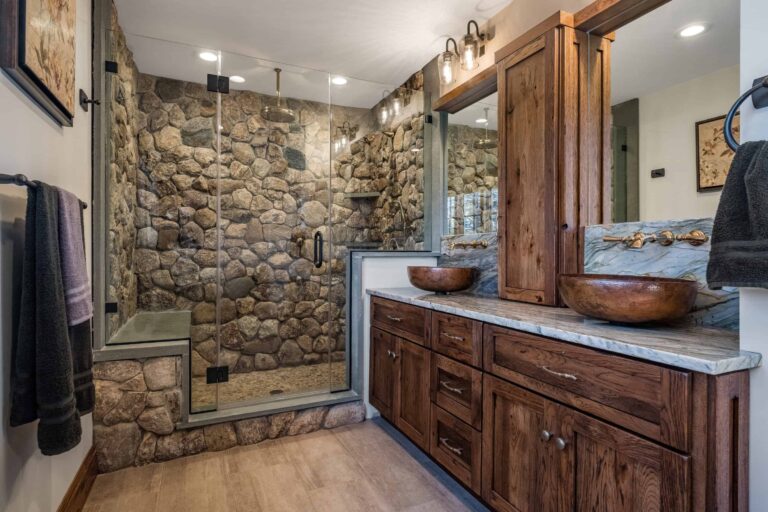
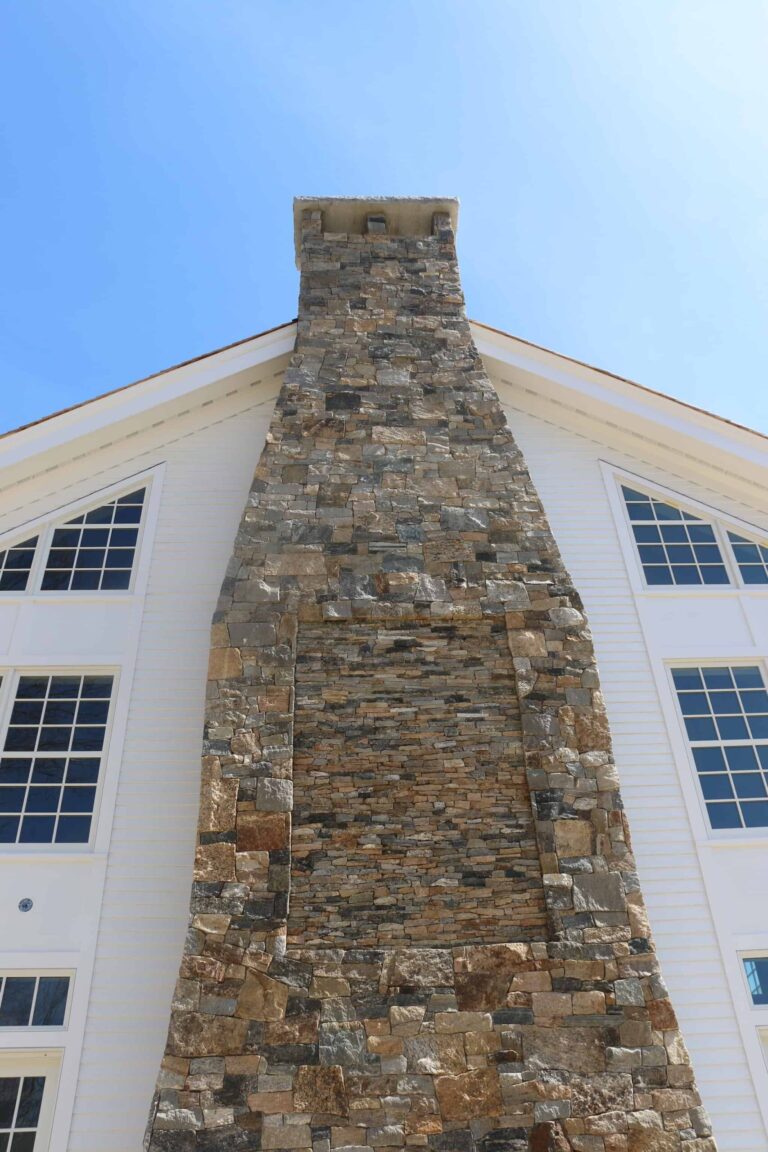
Hanging Stones Post Waterproofing
Now that you’ve completed the waterproofing process, it’s time to dive into the final phase of stone veneer installation – hanging stones.
Preparations before Hanging Stones
The first step is preparing your surface and ensuring everything is ready for a successful install.
This involves checking if all screw holes are covered with high bond cement, and there’s no openings improperly installed in the stone veneer due to improper installation.
Your goal should be creating a full stone wall without any gaps or inconsistencies.
Selecting Your Stone Prior to Installation
Prioritize selecting your natural stone prior to starting this stage of work. Lay your stones on the ground first to blend colors and shapes.
Techniques for Successful Stone Attachment
- Mortar Application:
To ensure proper bonding protection during installing a stonyard project, apply mortar generously on both the stone and the substrate. This allows each piece of rock adhere securely onto its substrate.
- Joints Filling:
The next step after applying mortar would be filling up every joint between individual rocks using more wet mixture until they’re completely sealed off from potential water intrusion. so hiring one can save lots headaches down line when things go wrong because something wasn’t done right initially. Remember: The success behind any great build lies not just within how well it looks upon completion – rather what matters most here includes durability & longevity too; hence why making sure everything gets installed properly becomes so crucial throughout entire process.
FAQs in Relation to Installation of Stone Veneer
How is stone veneer installed?
Stone veneer installation involves waterproofing the substrate, checking thickness with a wet film gauge, strengthening screw holes with high bond cement, and finally hanging stones post-waterproofing.
Can I install stone veneer over drywall?
Yes, you can install stone veneer over drywall. However, it’s essential to ensure the wall can support the weight of the veneer and that an appropriate adhesive is used.
How do you attach exterior stone veneer?
Exterior Stone Veneers are attached using a mortar mix applied to both the back of the stones and directly onto your prepared surface before pressing them into place.
Do I need cement board for stone veneer?
While not always necessary, using cement board as a backing for Stone Veneers provides added durability and strength to your installation.
Reminders
Installation of stone veneer is a meticulous process, but one that’s worth mastering.
The waterproofing stage sets the foundation for success.
Thickness matters; remember to use your wet film gauge after each coat application.
Screw holes need love too – strengthen them with high bond cement for long-lasting durability.
Hanging stones post-waterproofing? It’s not just an art. It’s science in action!
You’ve now got the basics down pat and are ready to embark on your own stonework journey. But why stop there?
Dive deeper into this fascinating world of natural stone veneer siding with Stoneyard. Let’s start crafting together today!